It was originally inspired by the walkthrough friends and I found on deviantart. It's actually the same source of inspiration for moving steampunk hands from at least one other steampunker I've met.
In 2011, a good friend of mine at the time, Simon, offered to help me, which was just the motivation I needed to start working on this. I've always been more of a storyteller and world-builder than prop artist, so the extra help was very necessary.
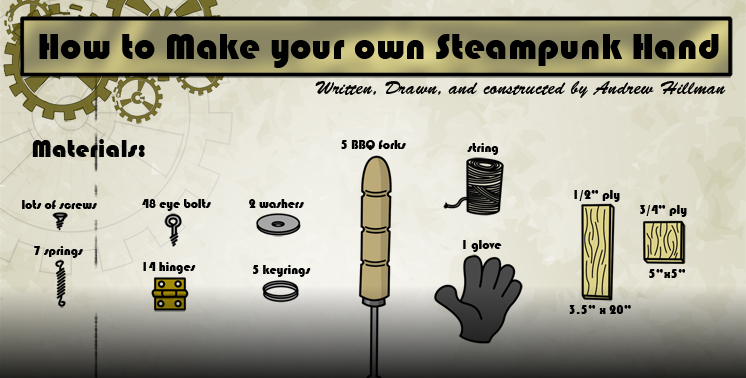
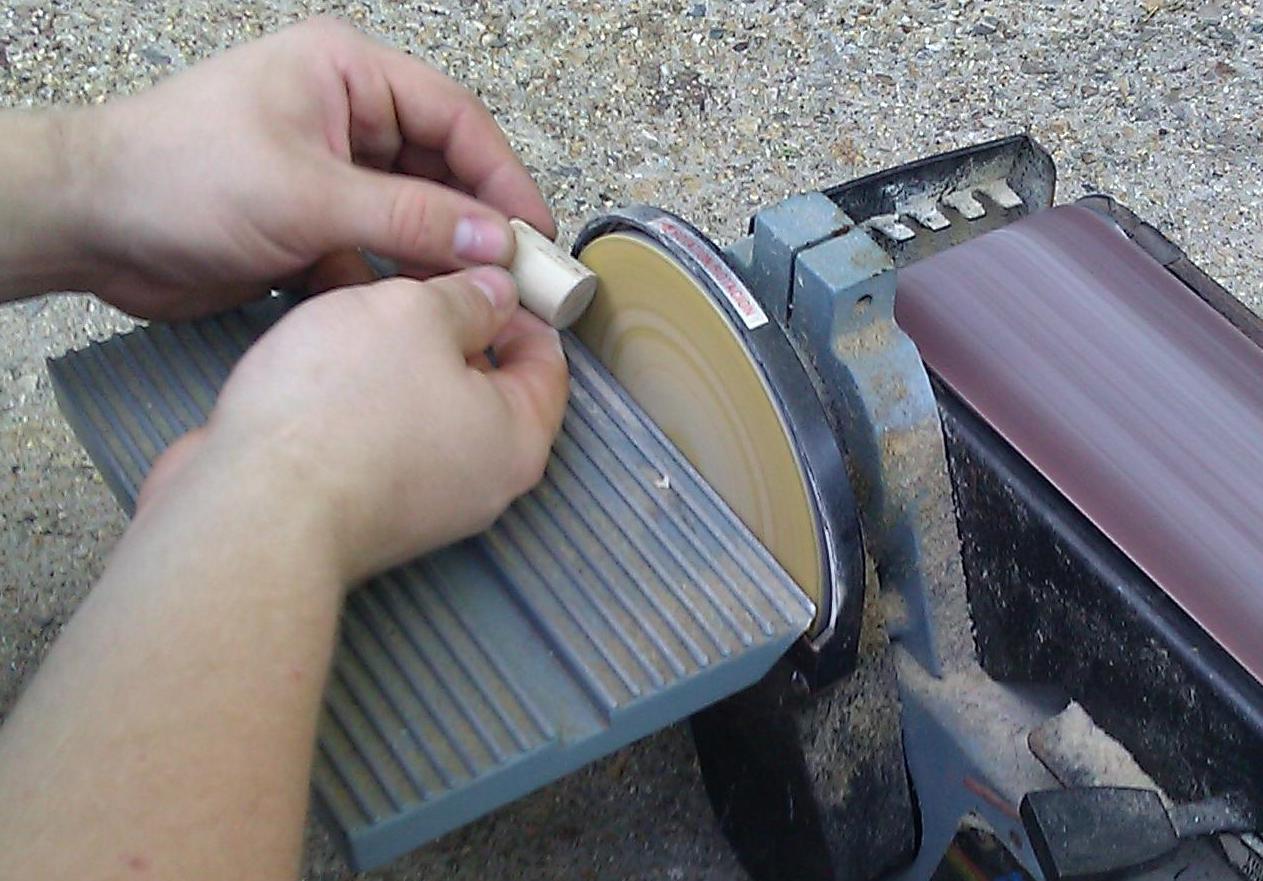
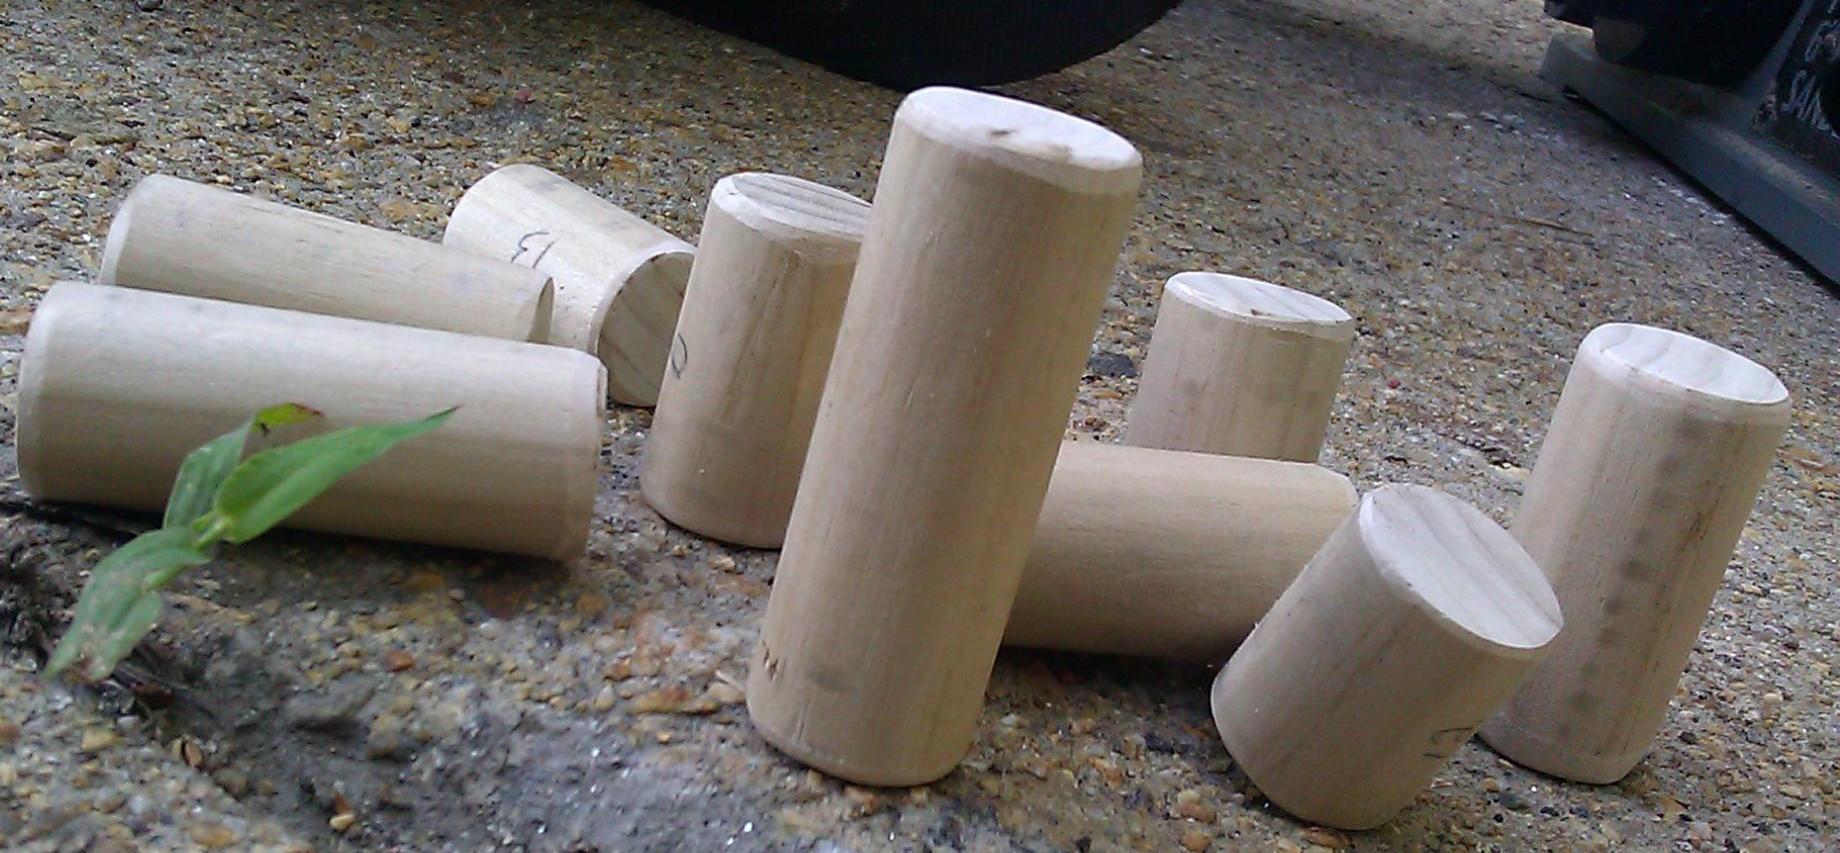
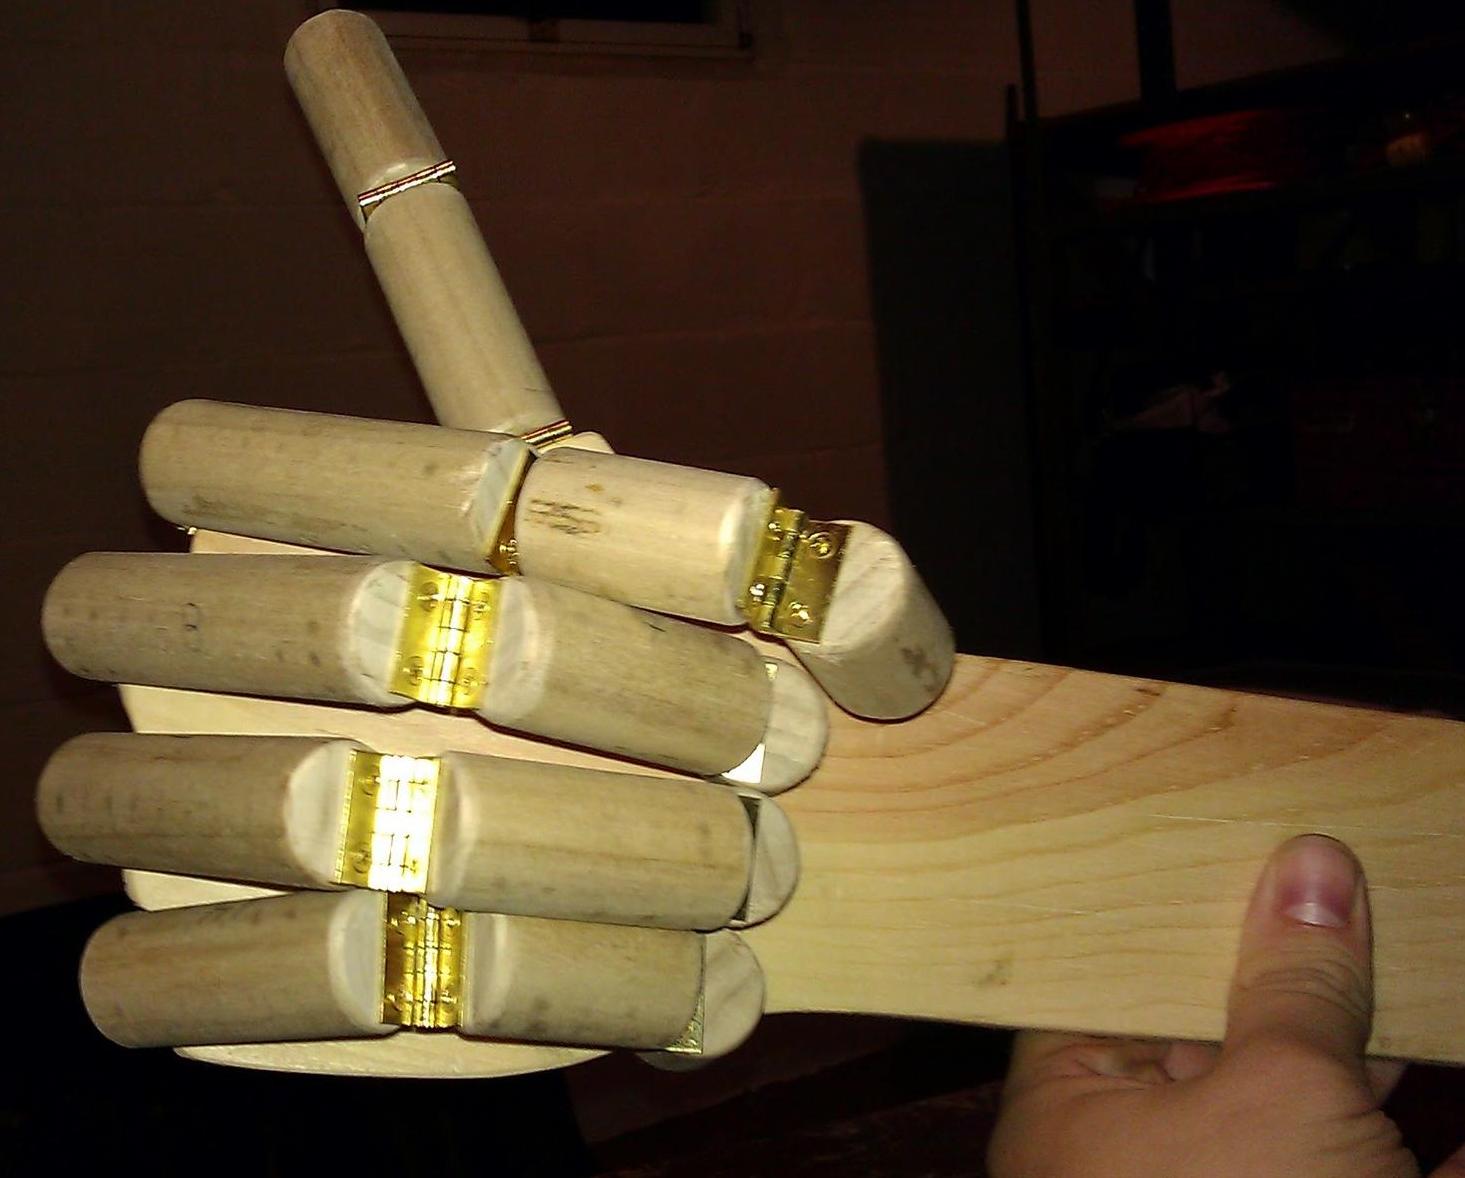
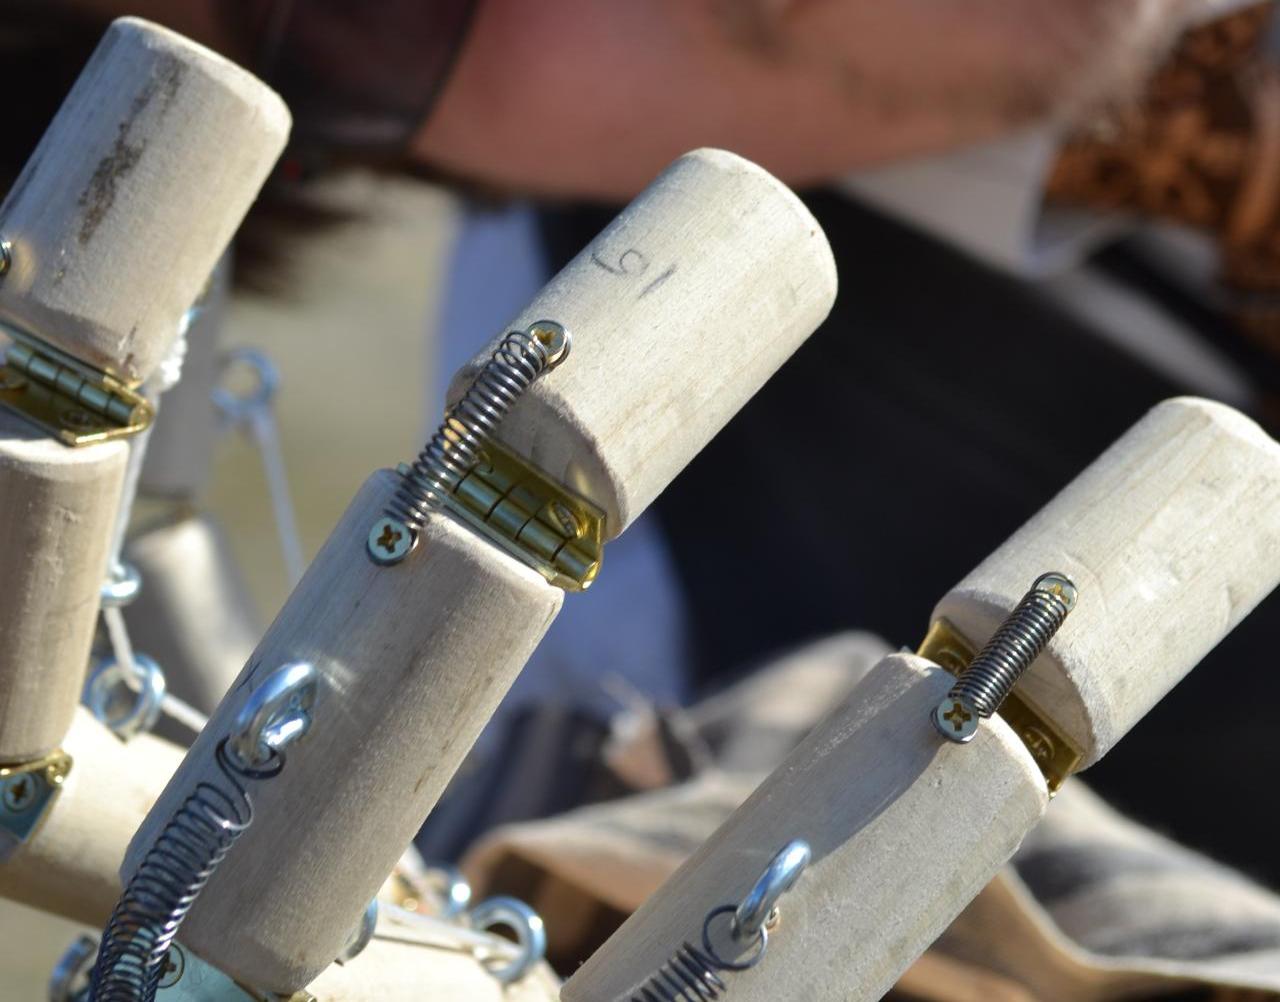
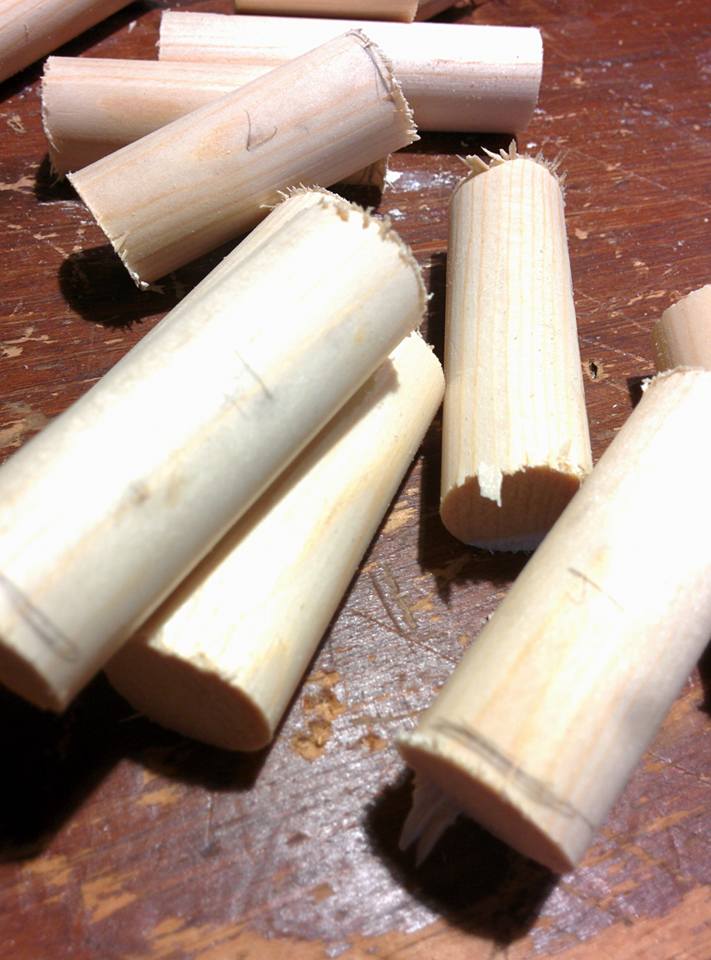
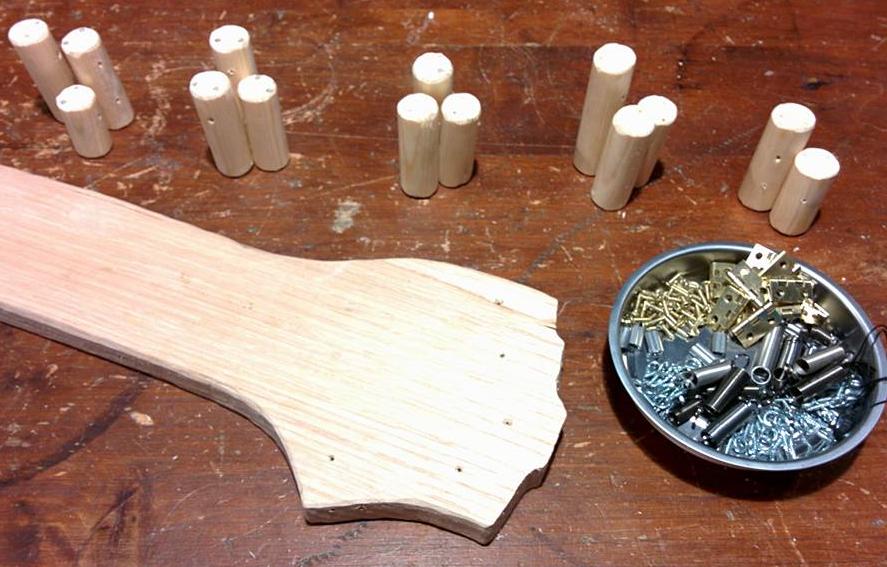
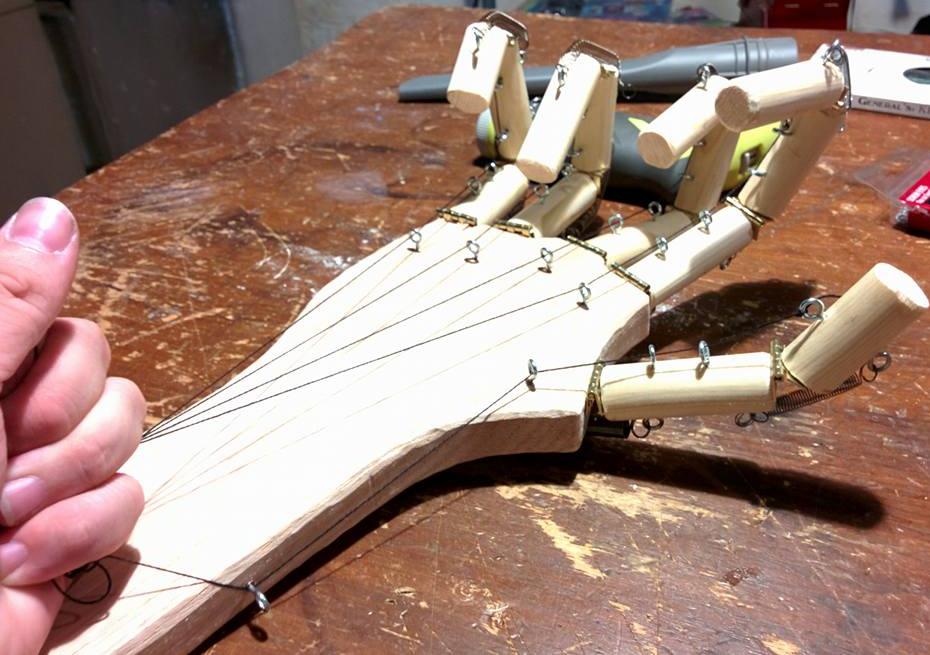
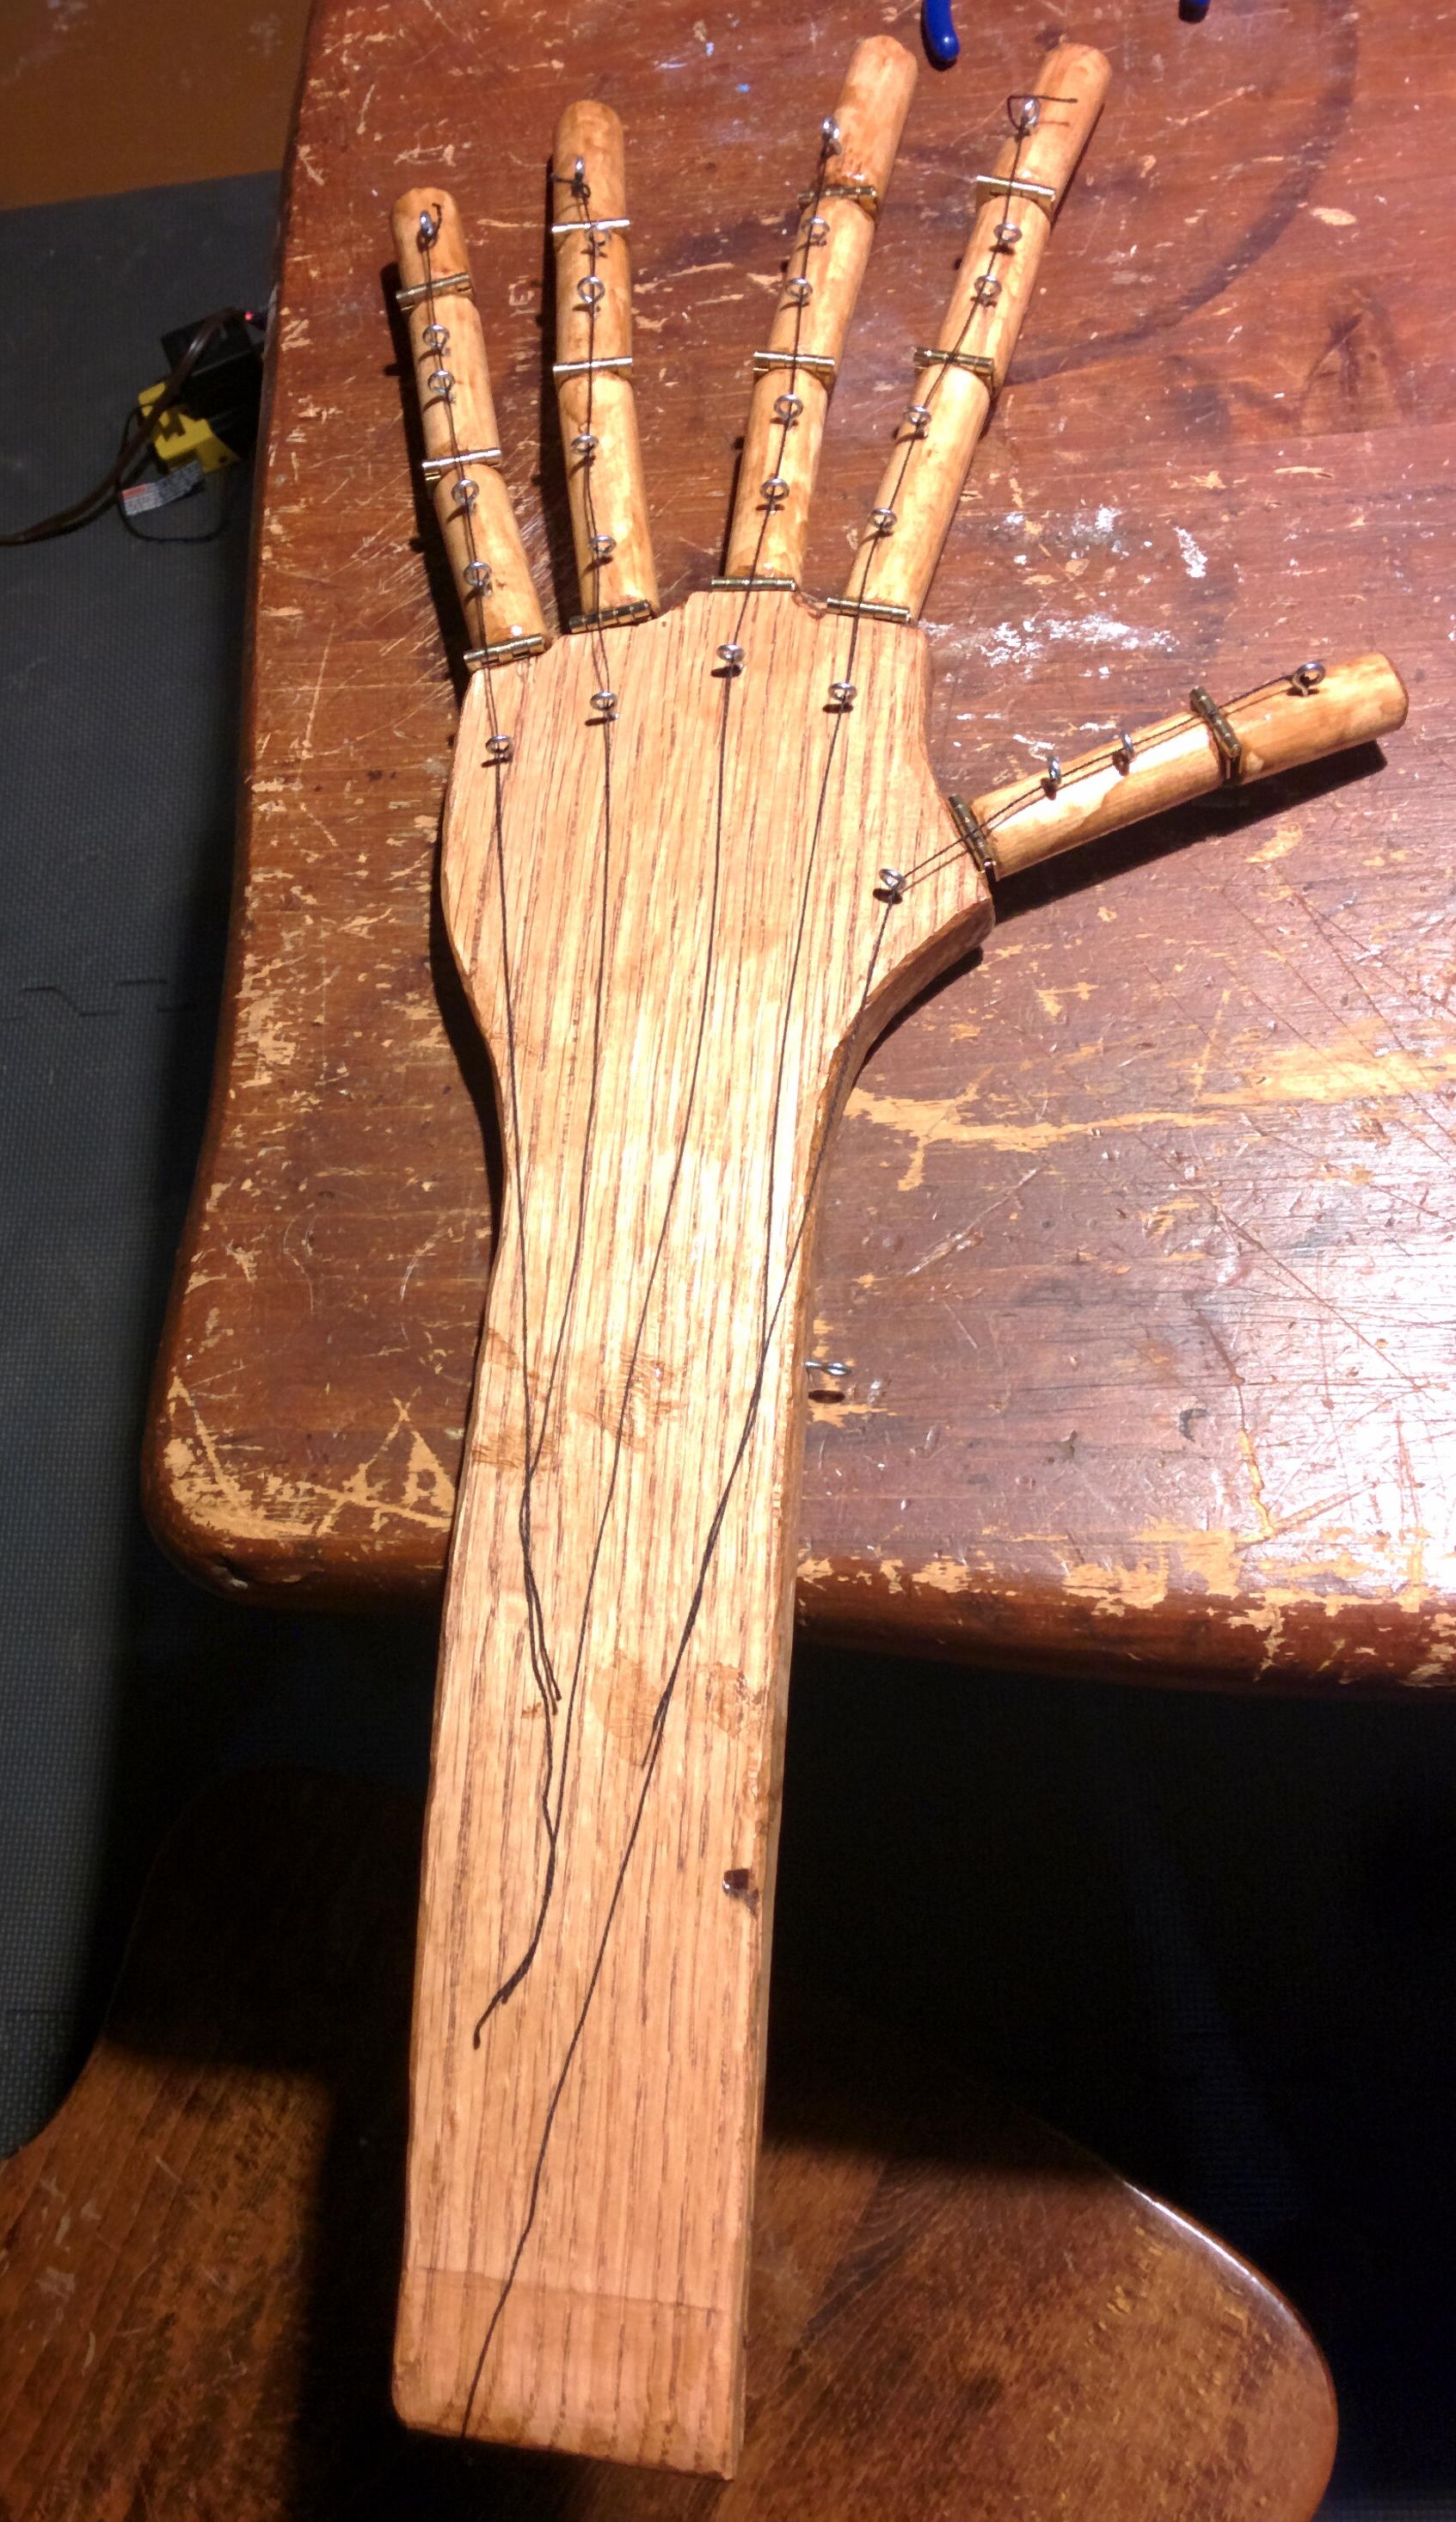
Honestly, the tutorial we found was based around BBQ forks that we totally couldn't find the likes of. If you can find the ones they used, it looks like a great option. So, in lieu of this, we improvised - with a dowel rod cut up in proportional sizes.
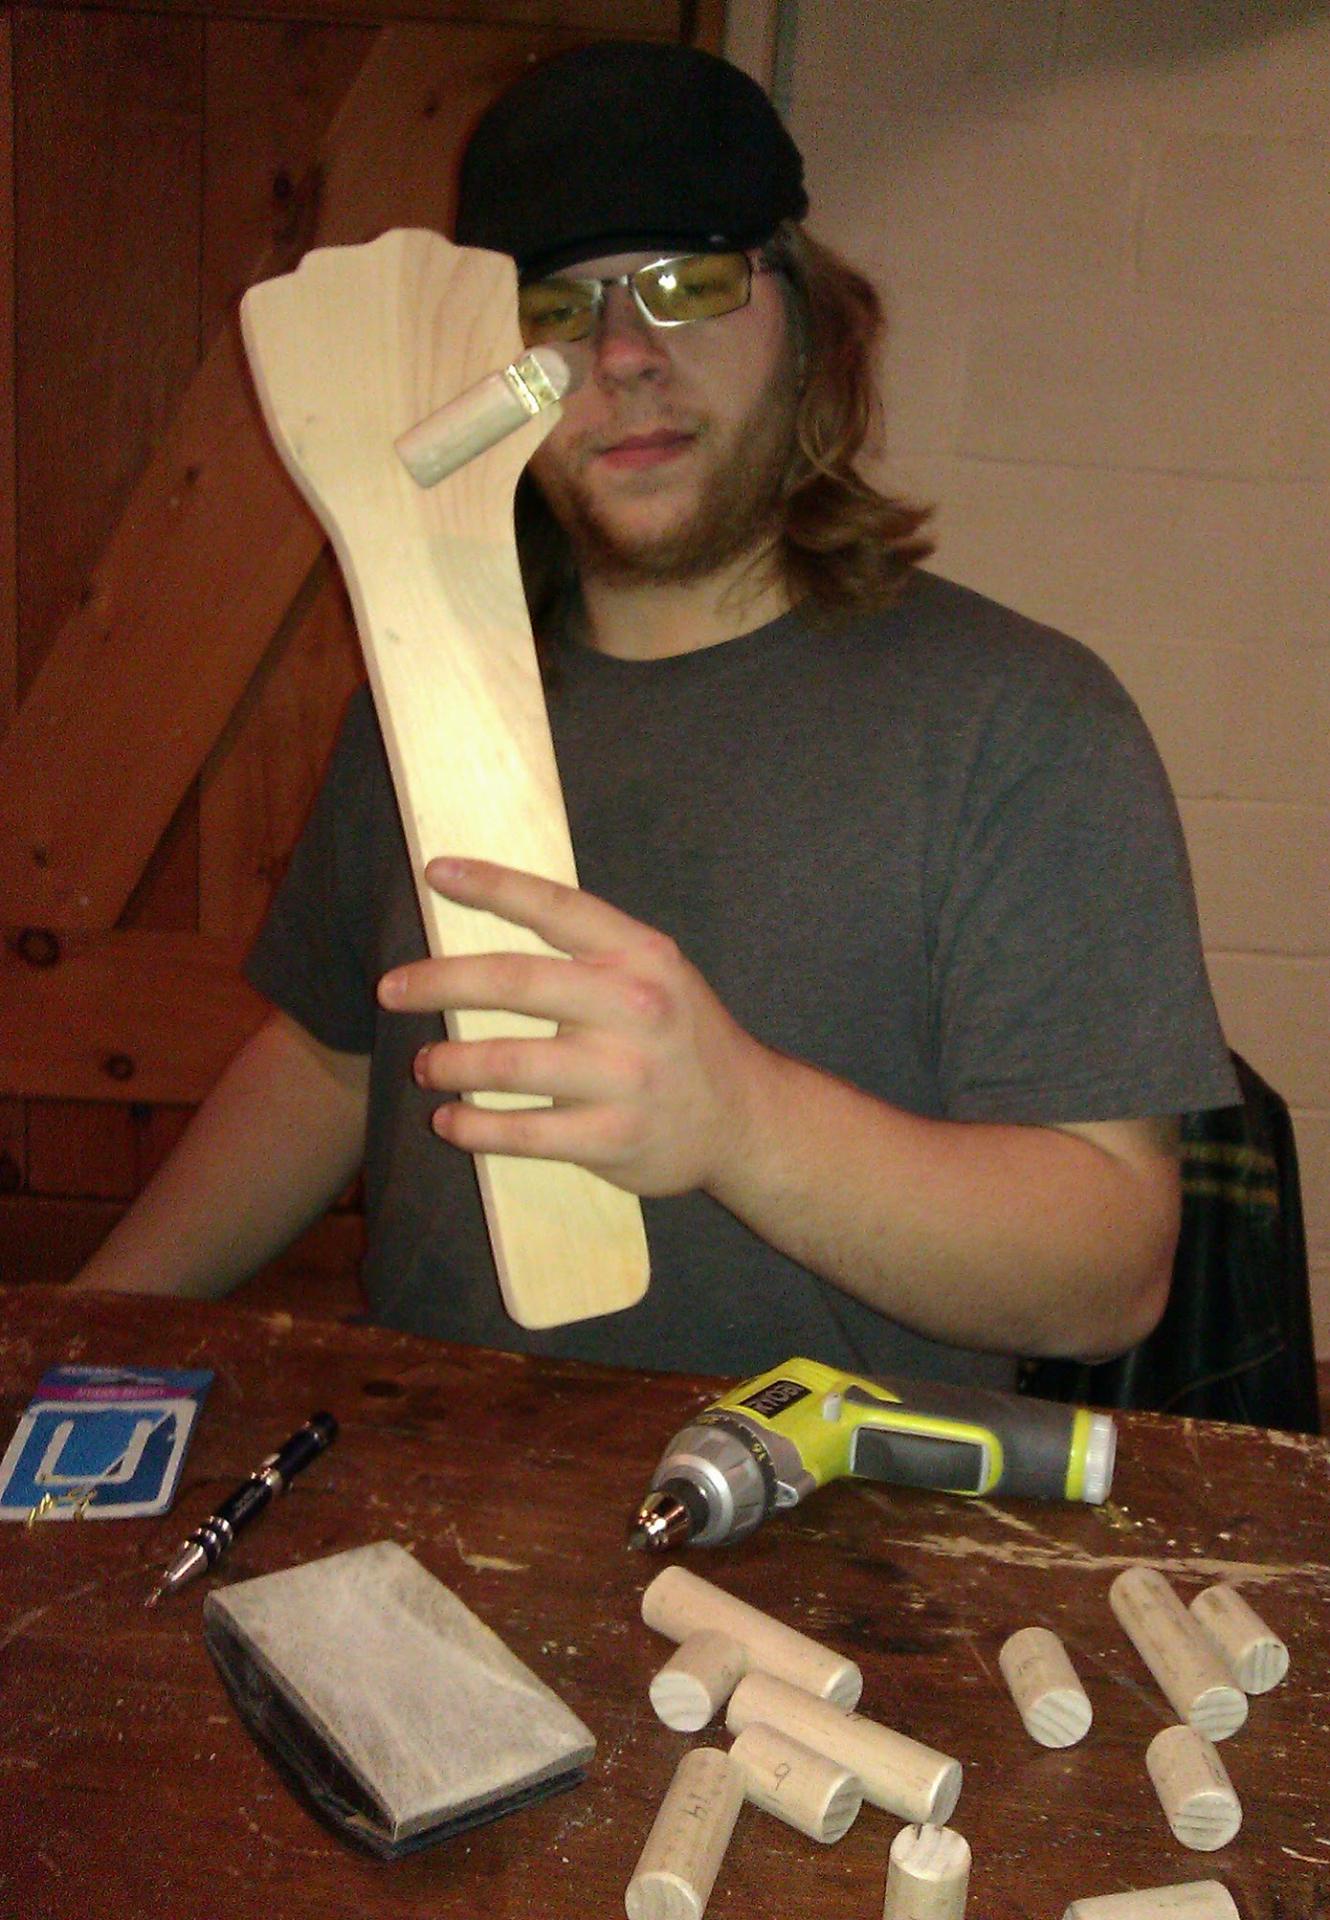
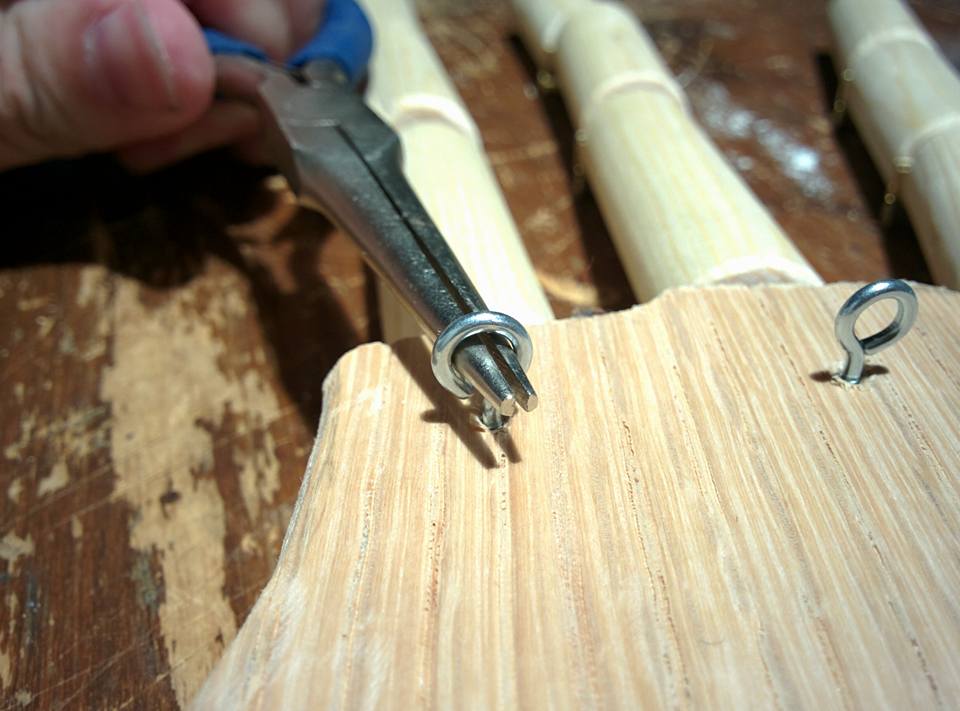
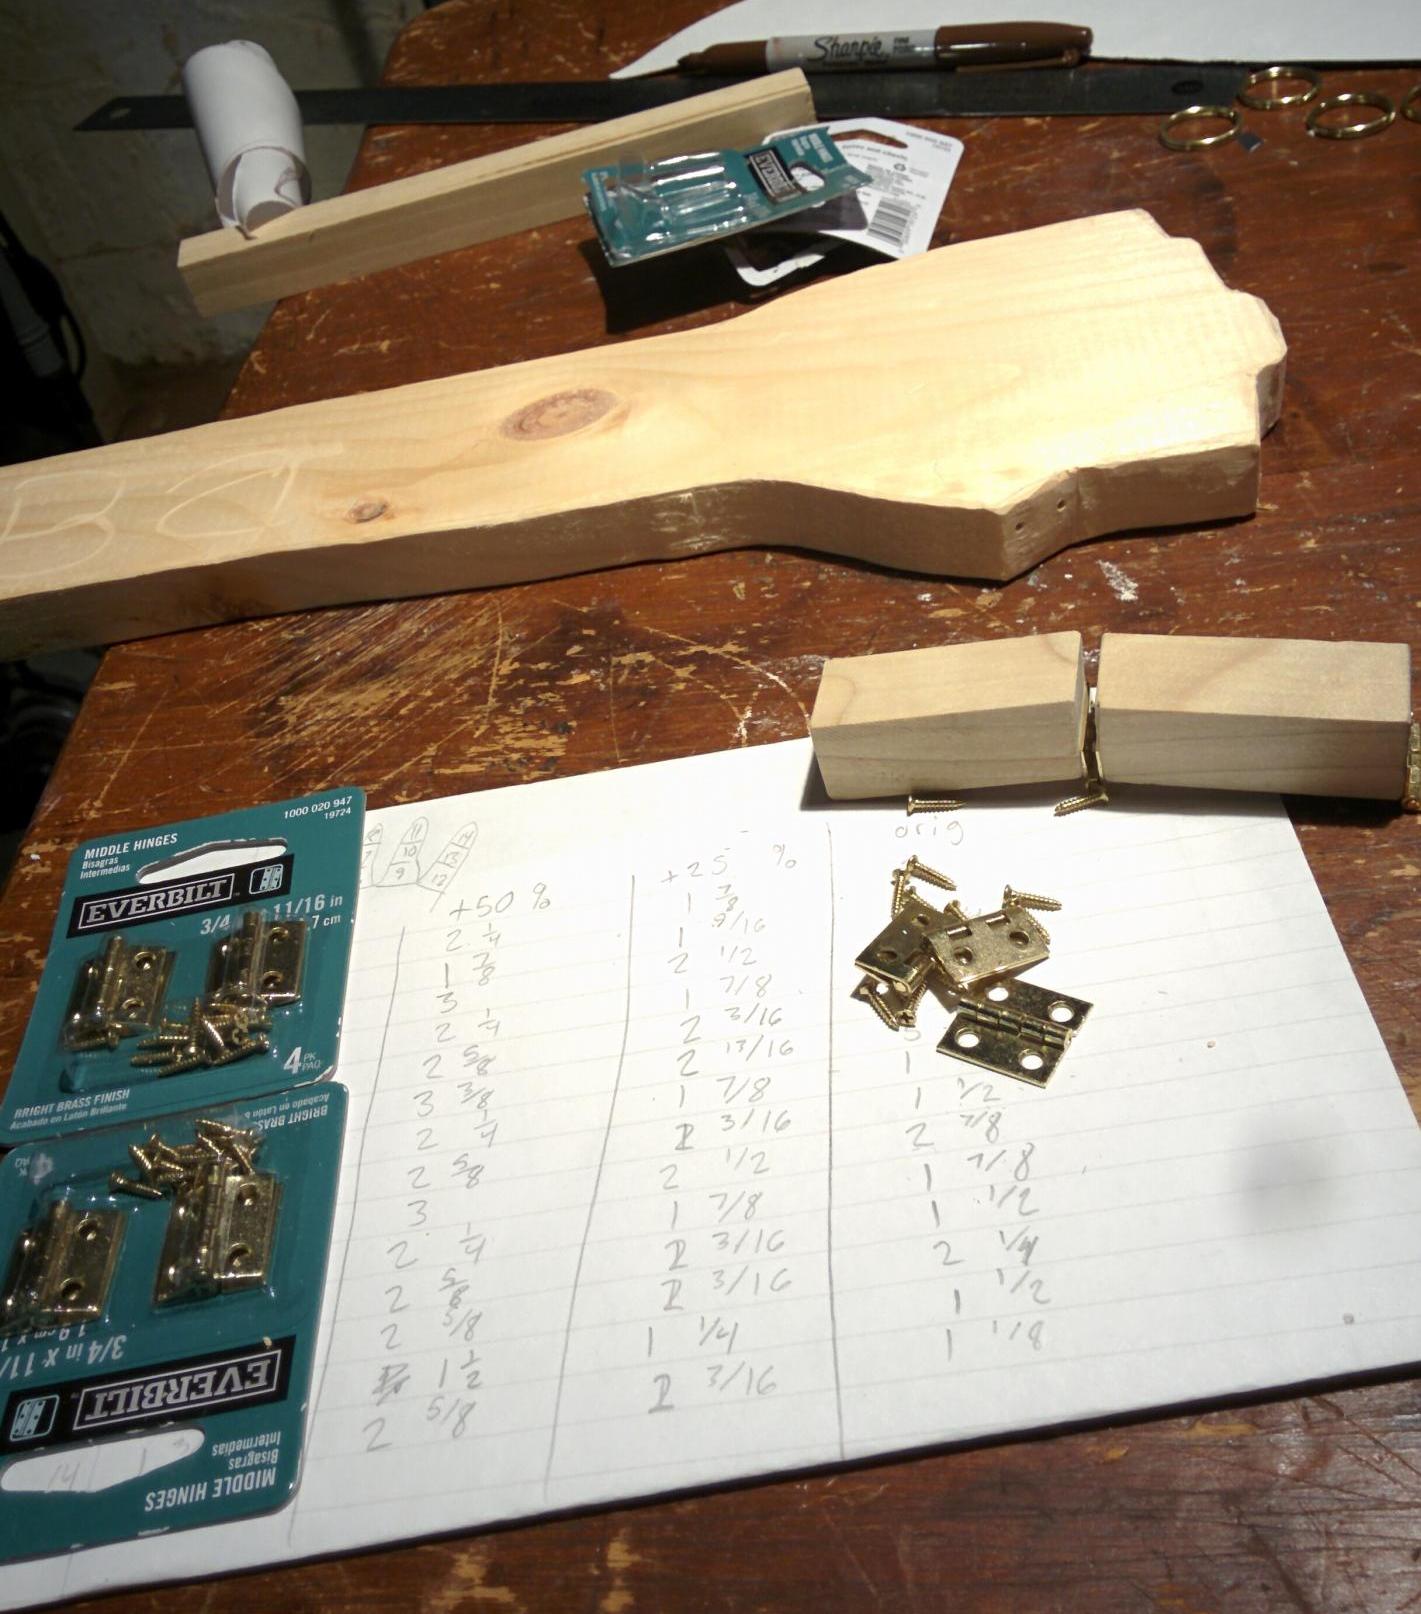
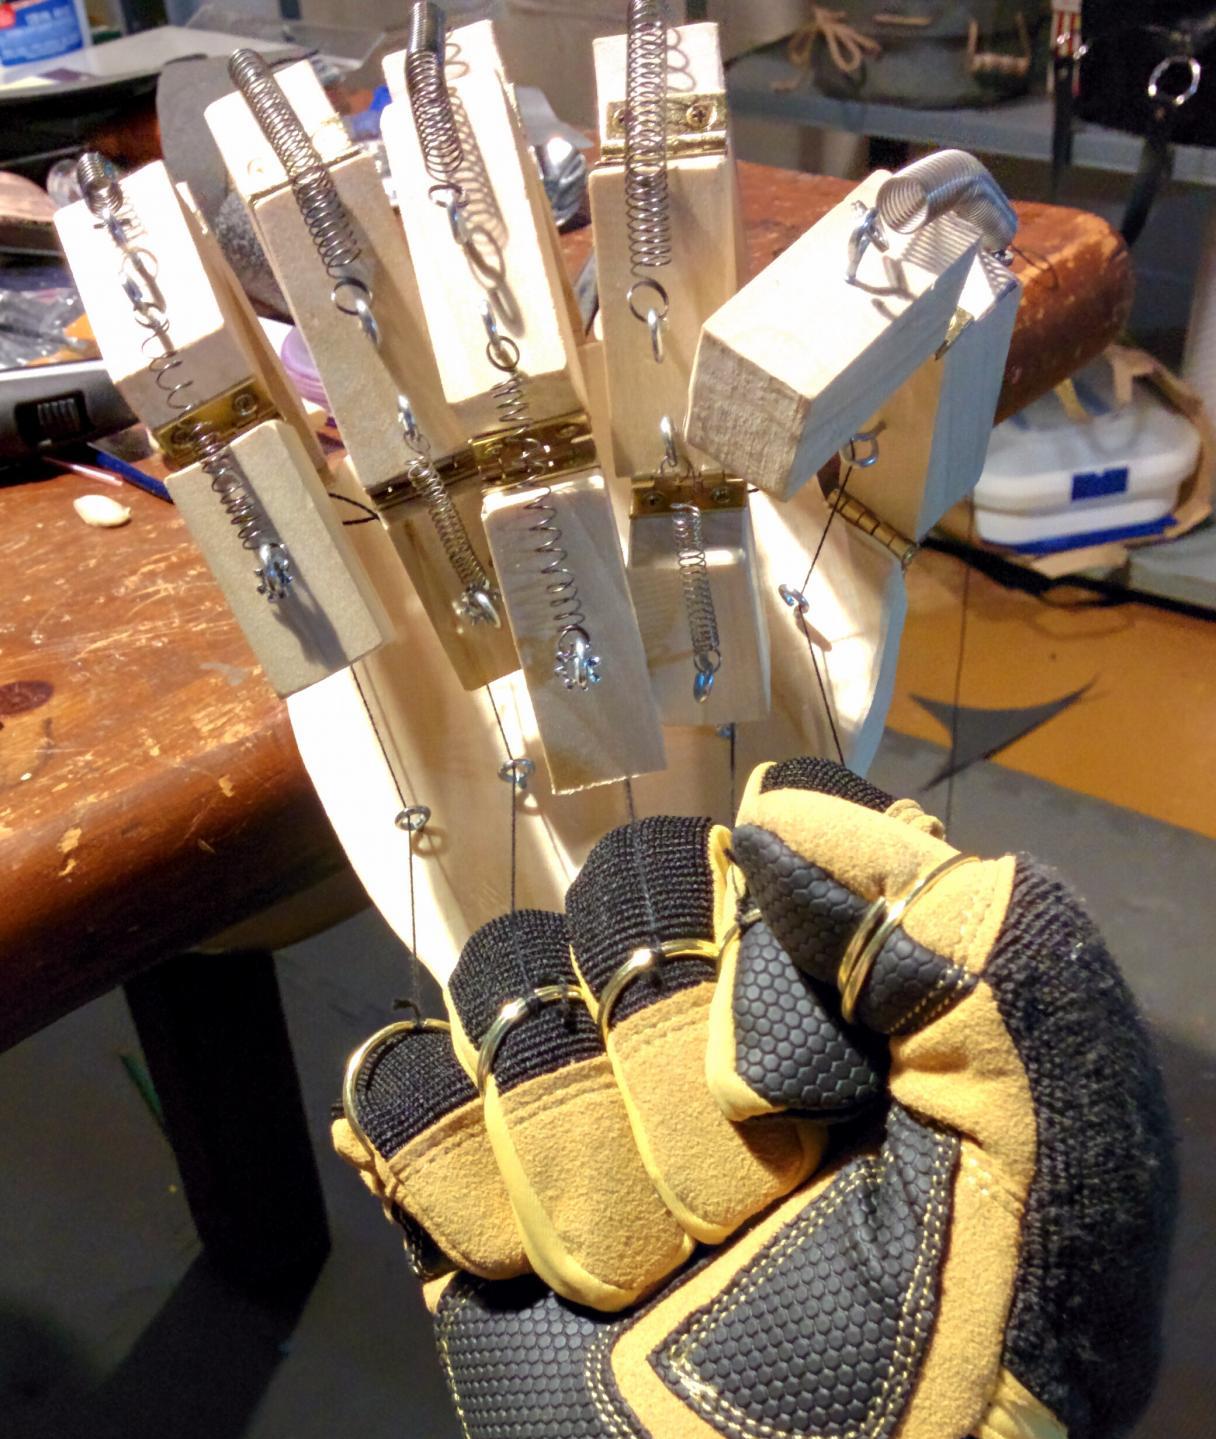
With all the wooden pieces cut out. We got the screws, eyelets, and other bits ready.
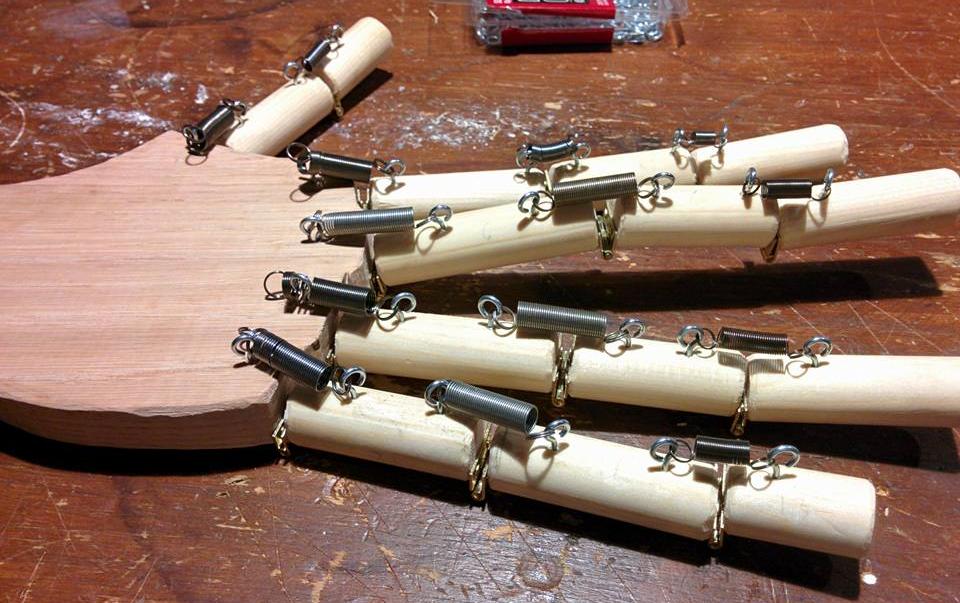
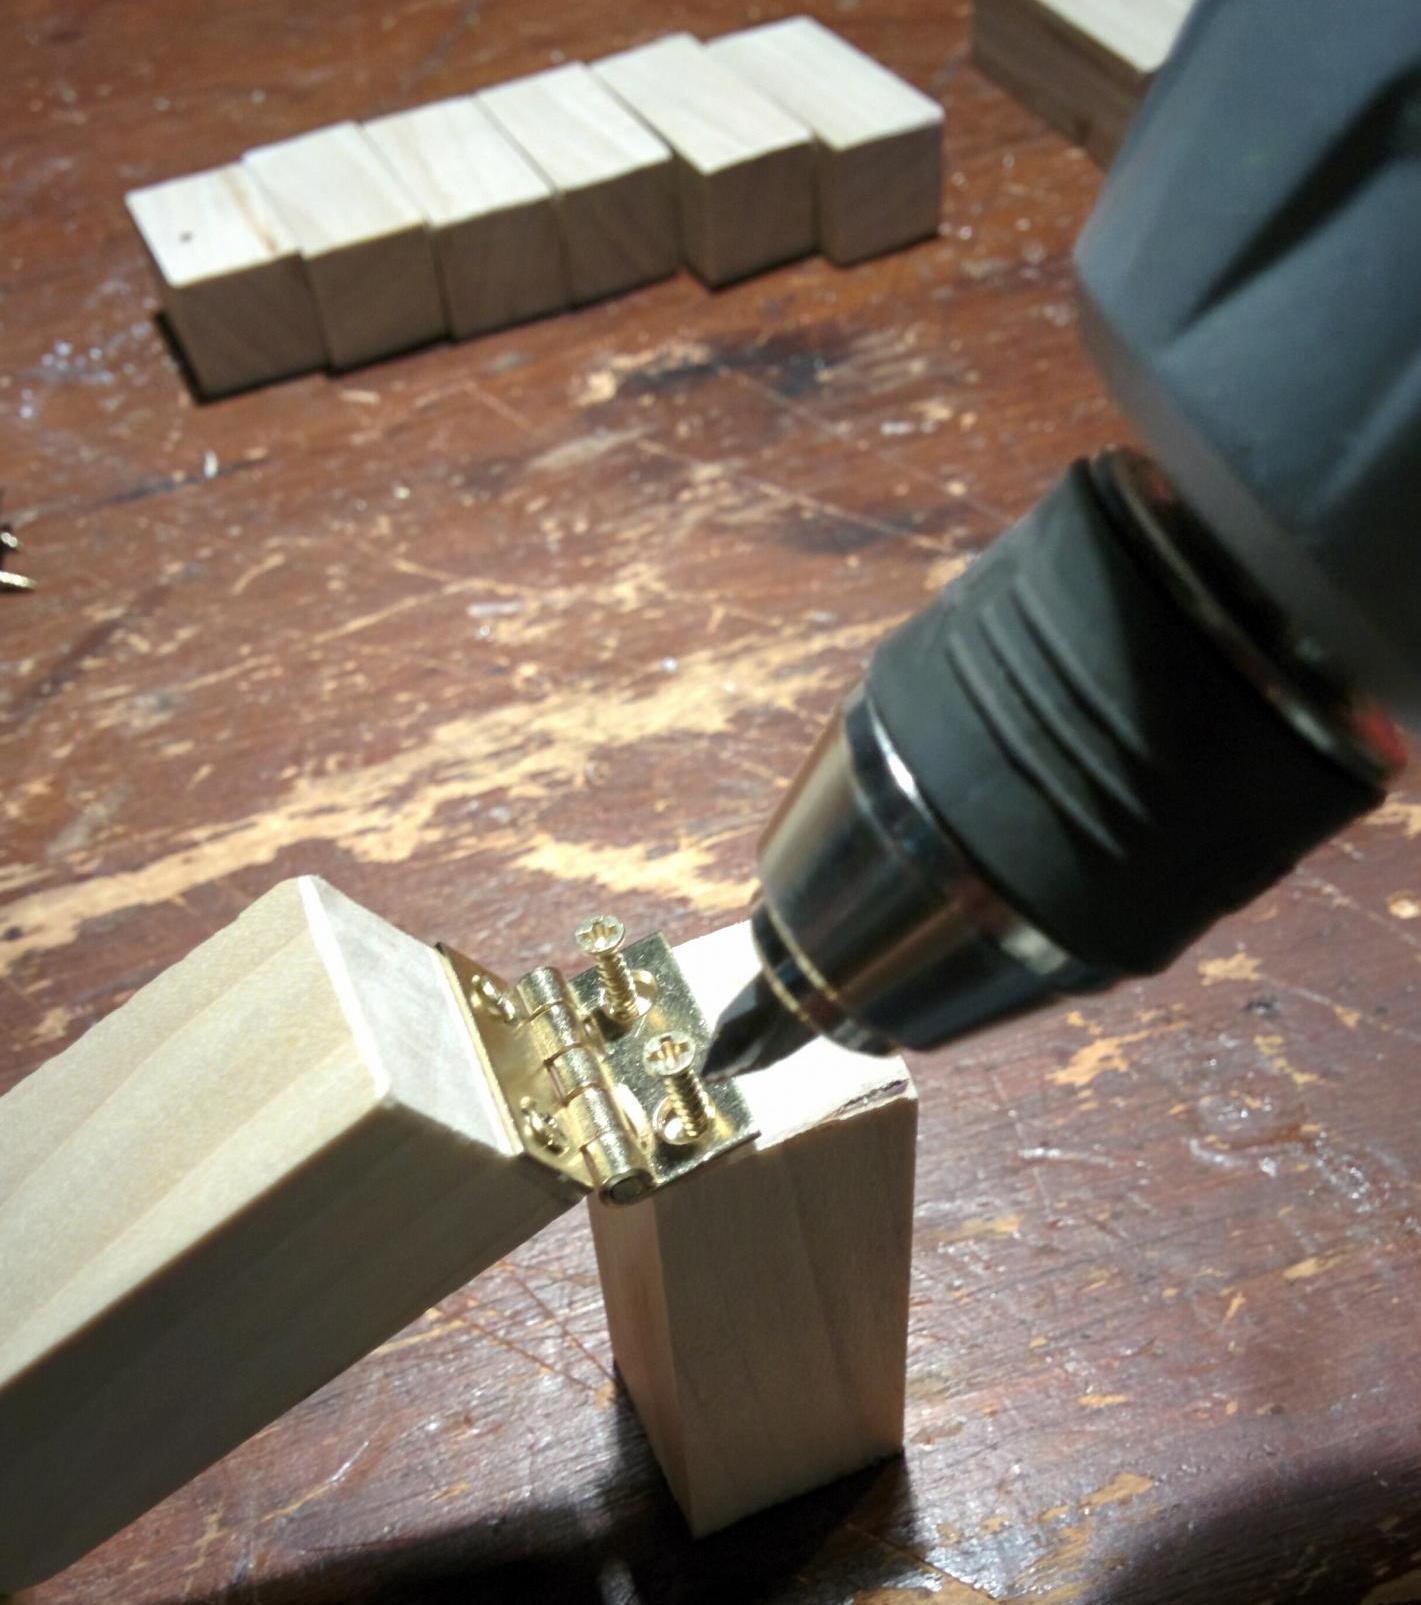
We first assembled the fingers and hand sections using the hinges, just to check that the fingers moved freely about in a natural way.
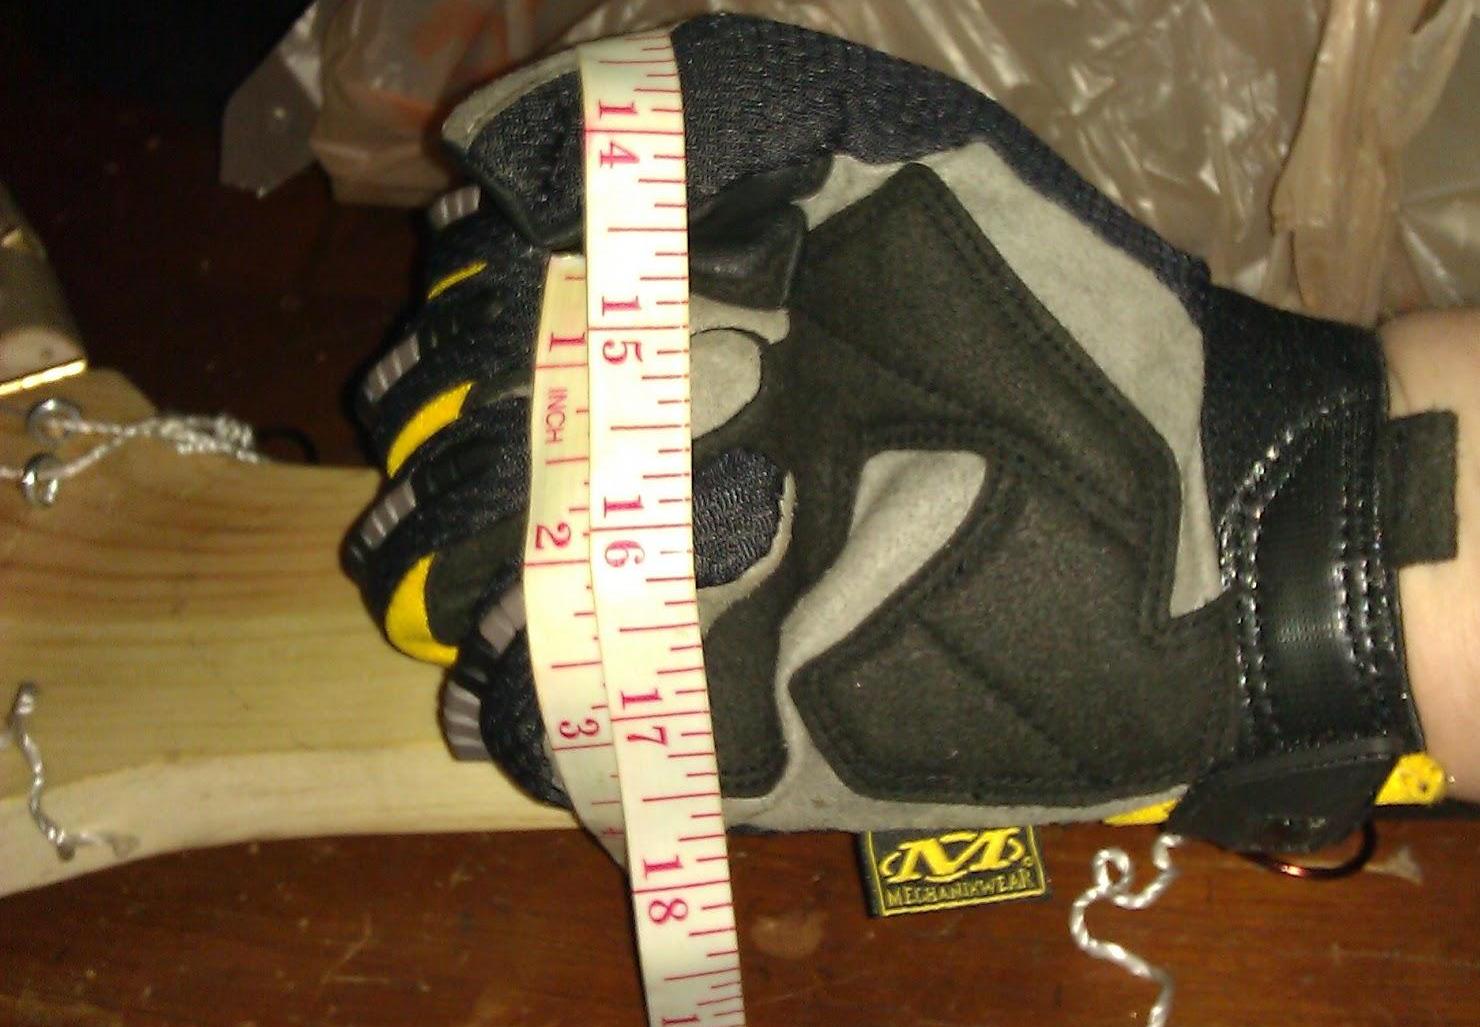
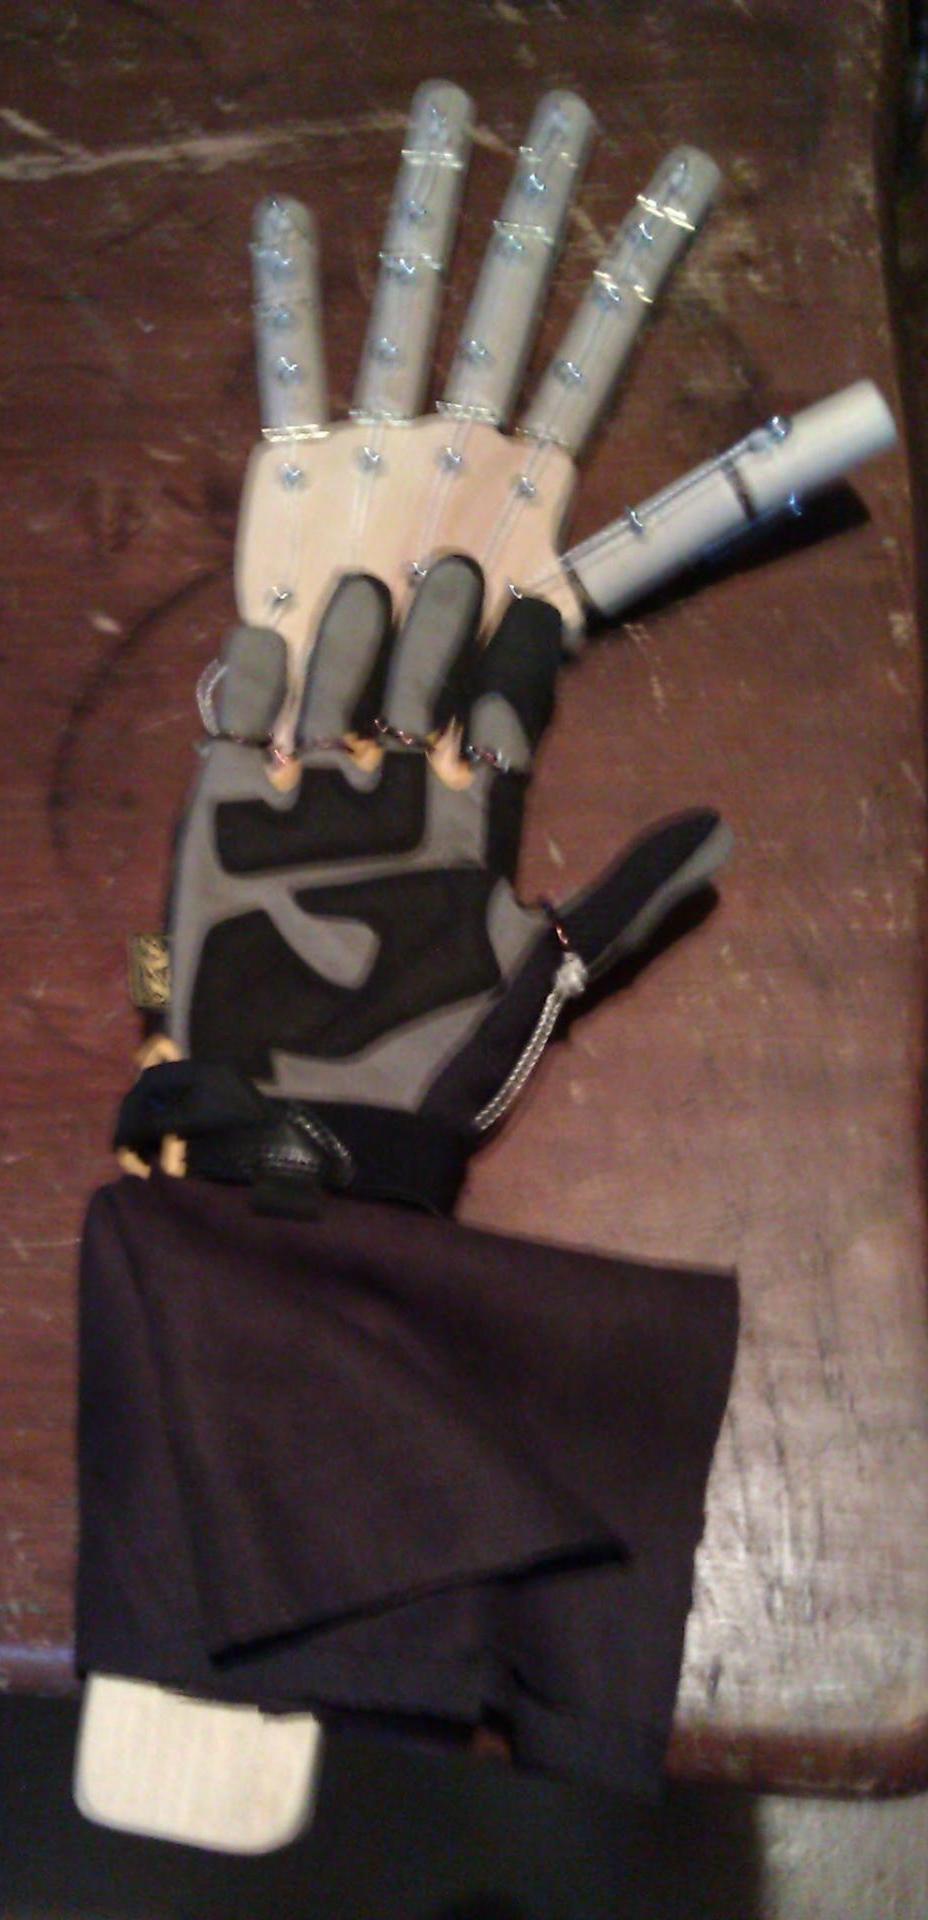
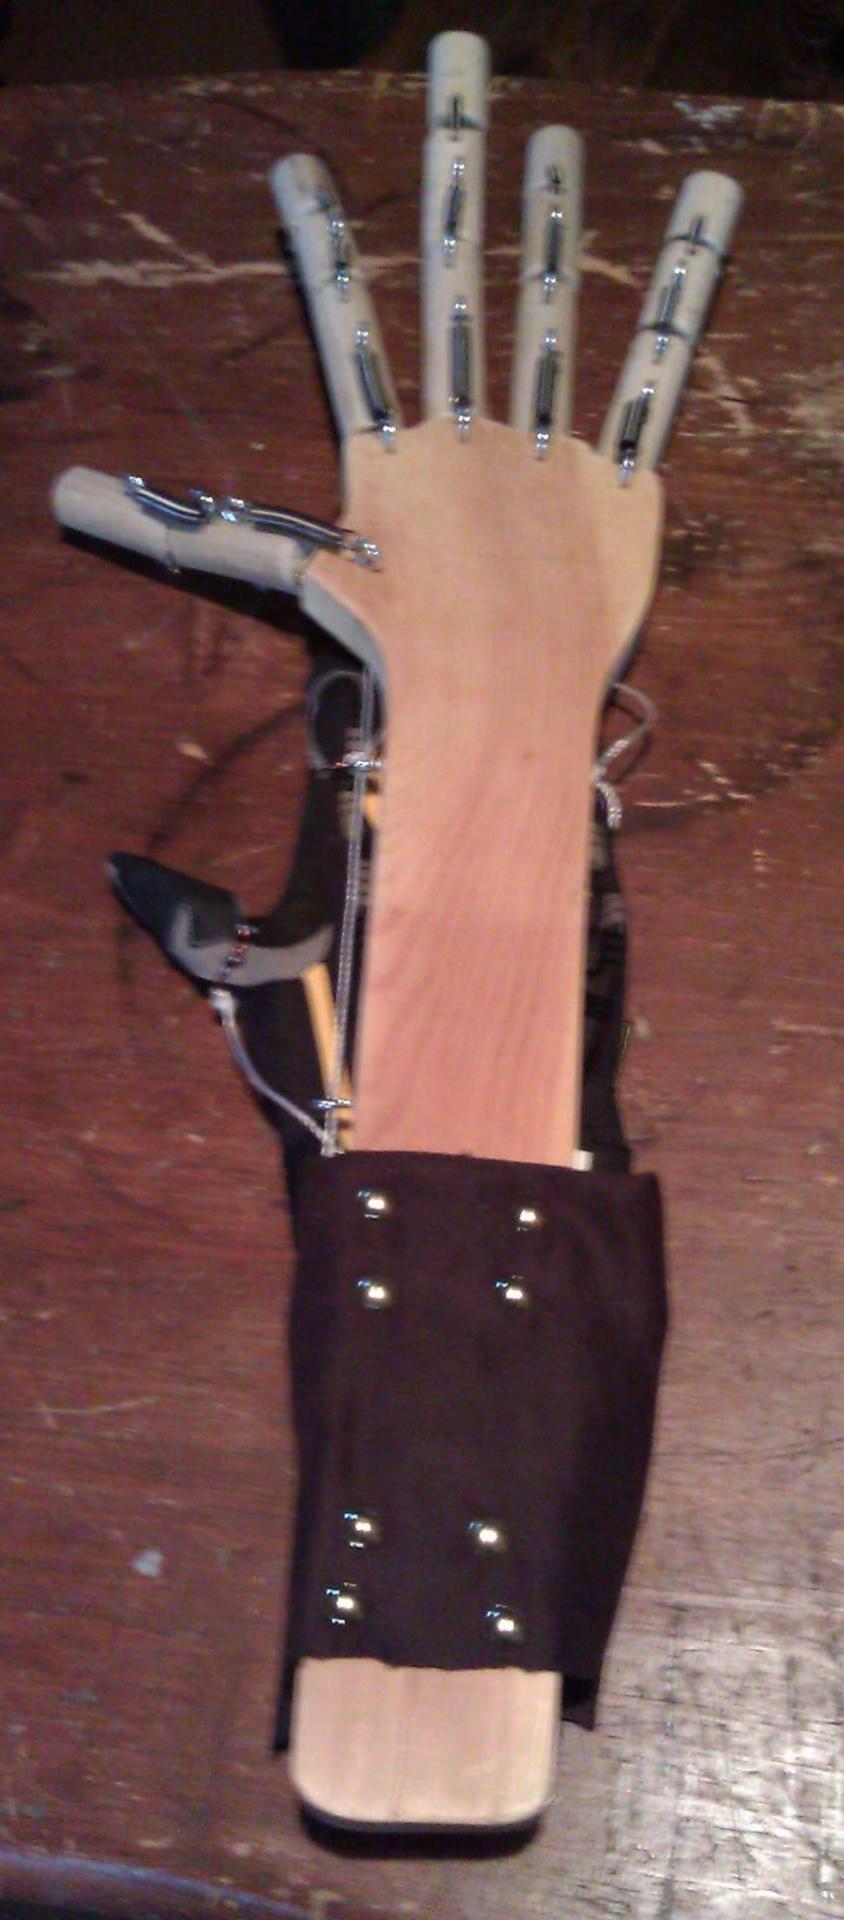
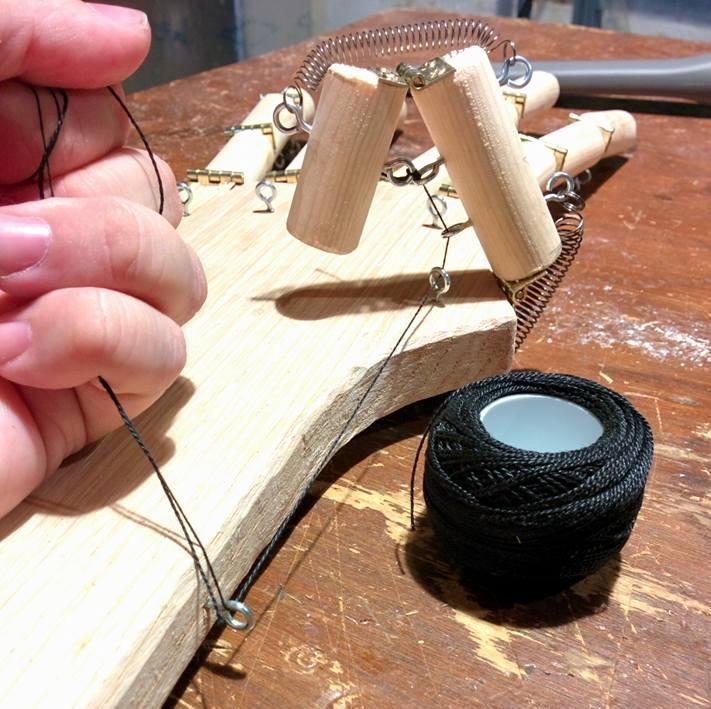
The external springs and internal strings were attached after the eyelets were screwed in. Then, the glove was attached (screwed through the back of the glove) and a sleeve to be fastened around the arm for stability was measured out and attached.
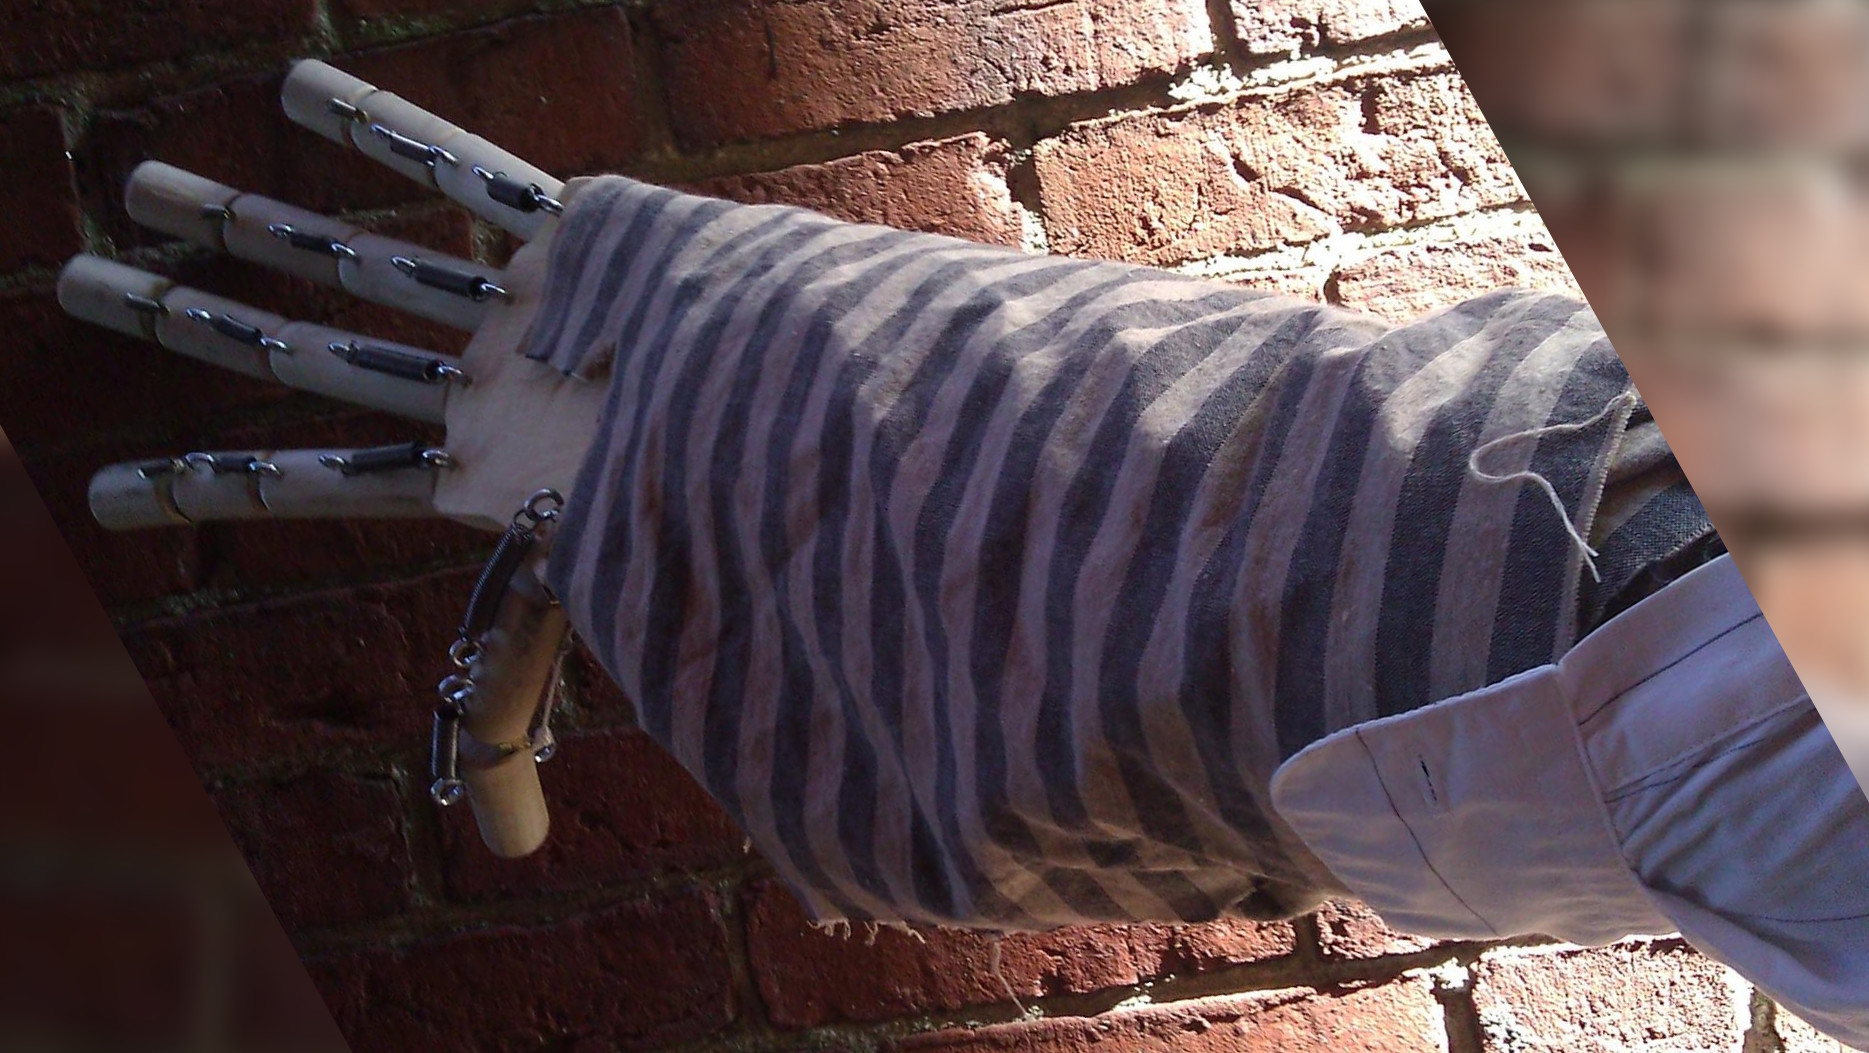
The arm strap closes via velcro. Here's how the arm looks - although I would some wood stain/sealant protecting it and improving the color.
It came out pretty good. I took it out pretty soon after to a photoshoot in Exeter with Phin, Abigail, and Walter - at that time in the March of 2012, the active members.
Evolution & Sleeves
For the original photoshoot, I took a bit of spare fabric leftover from creating my original Antiford outfit, and just wrapped it around several times. I hadn't yet got into even basic hand-sewing at that time.
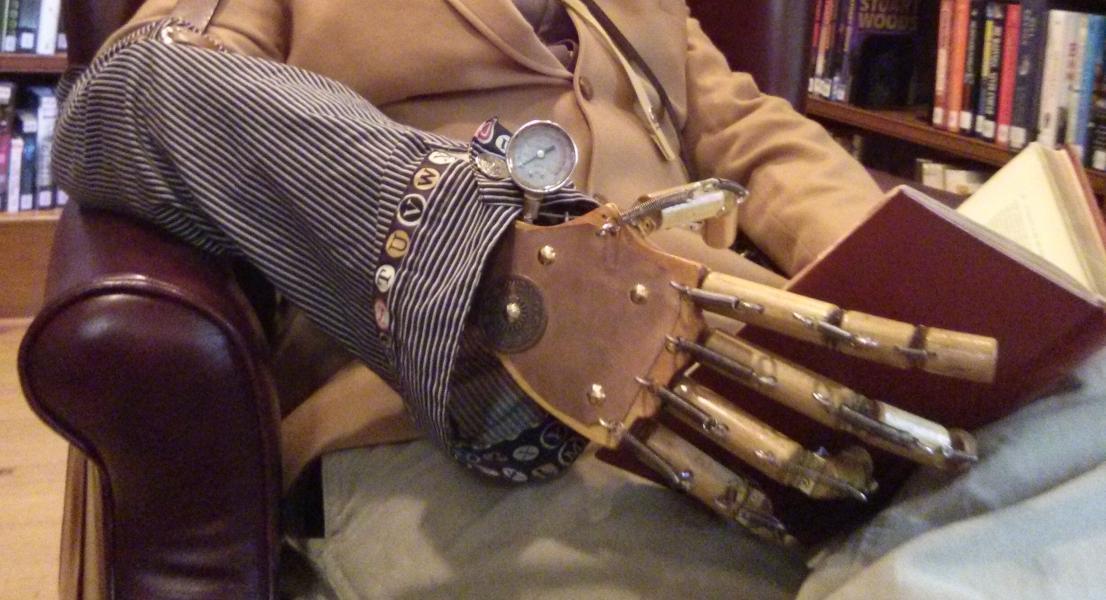
This would be replaced shortly after by a great-looking sleeve with
belt loop at the top for fastening and alphabet trim and button hole,
thanks to the talented Abigail.
I
would later add a pressure gauge on a nail to slip into the loop where
the button fastened in order to hold up the sleeve however I moved my
arms. The other addition you'll notice in the second photo, is the
addition of a metal sheet and clock-face piece.
Not shown, is the evolution from using string, to a small metal cable. The eyelet friction would wear the original string and cause it to snap. It would have to be re-strung after nearly every event. The cable has the opposite issue, the friction destroys eyelets, but the eyelet replacement rate is maybe once every 6 months, so it was a worthwhile trade-off overall.
Trying To Recreate
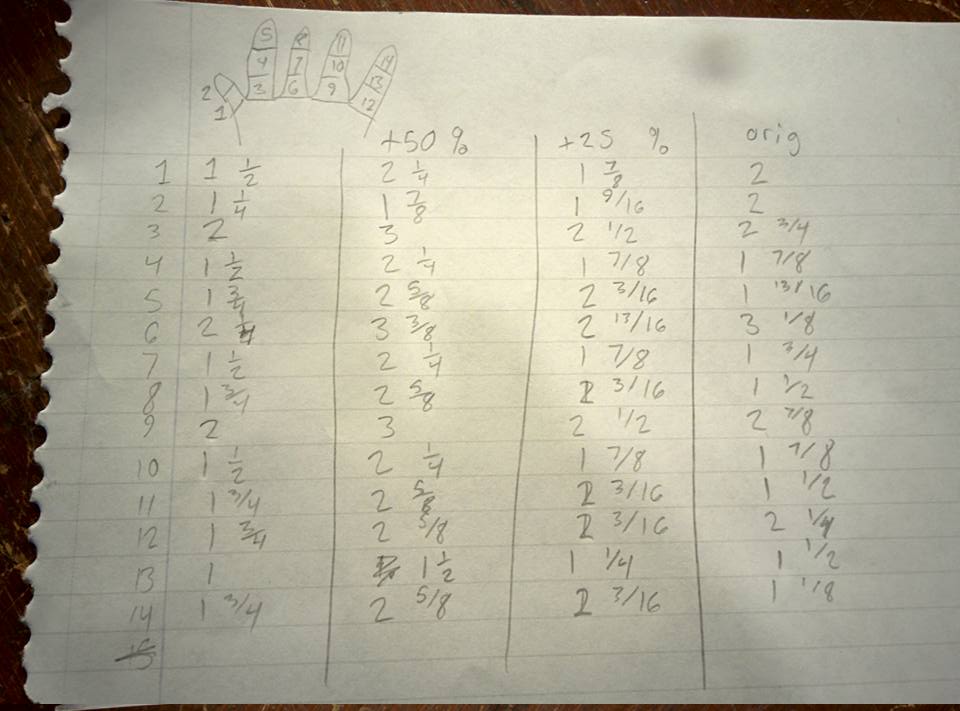
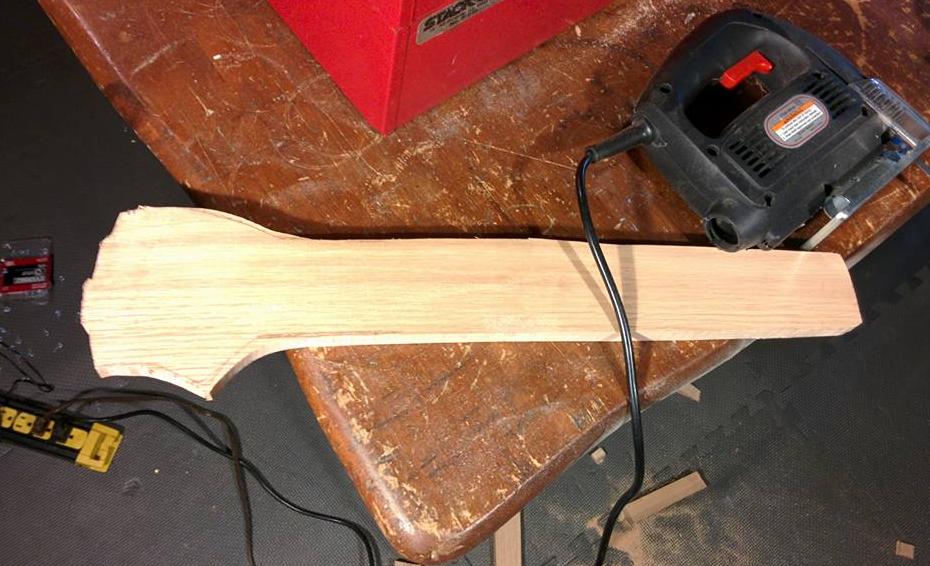
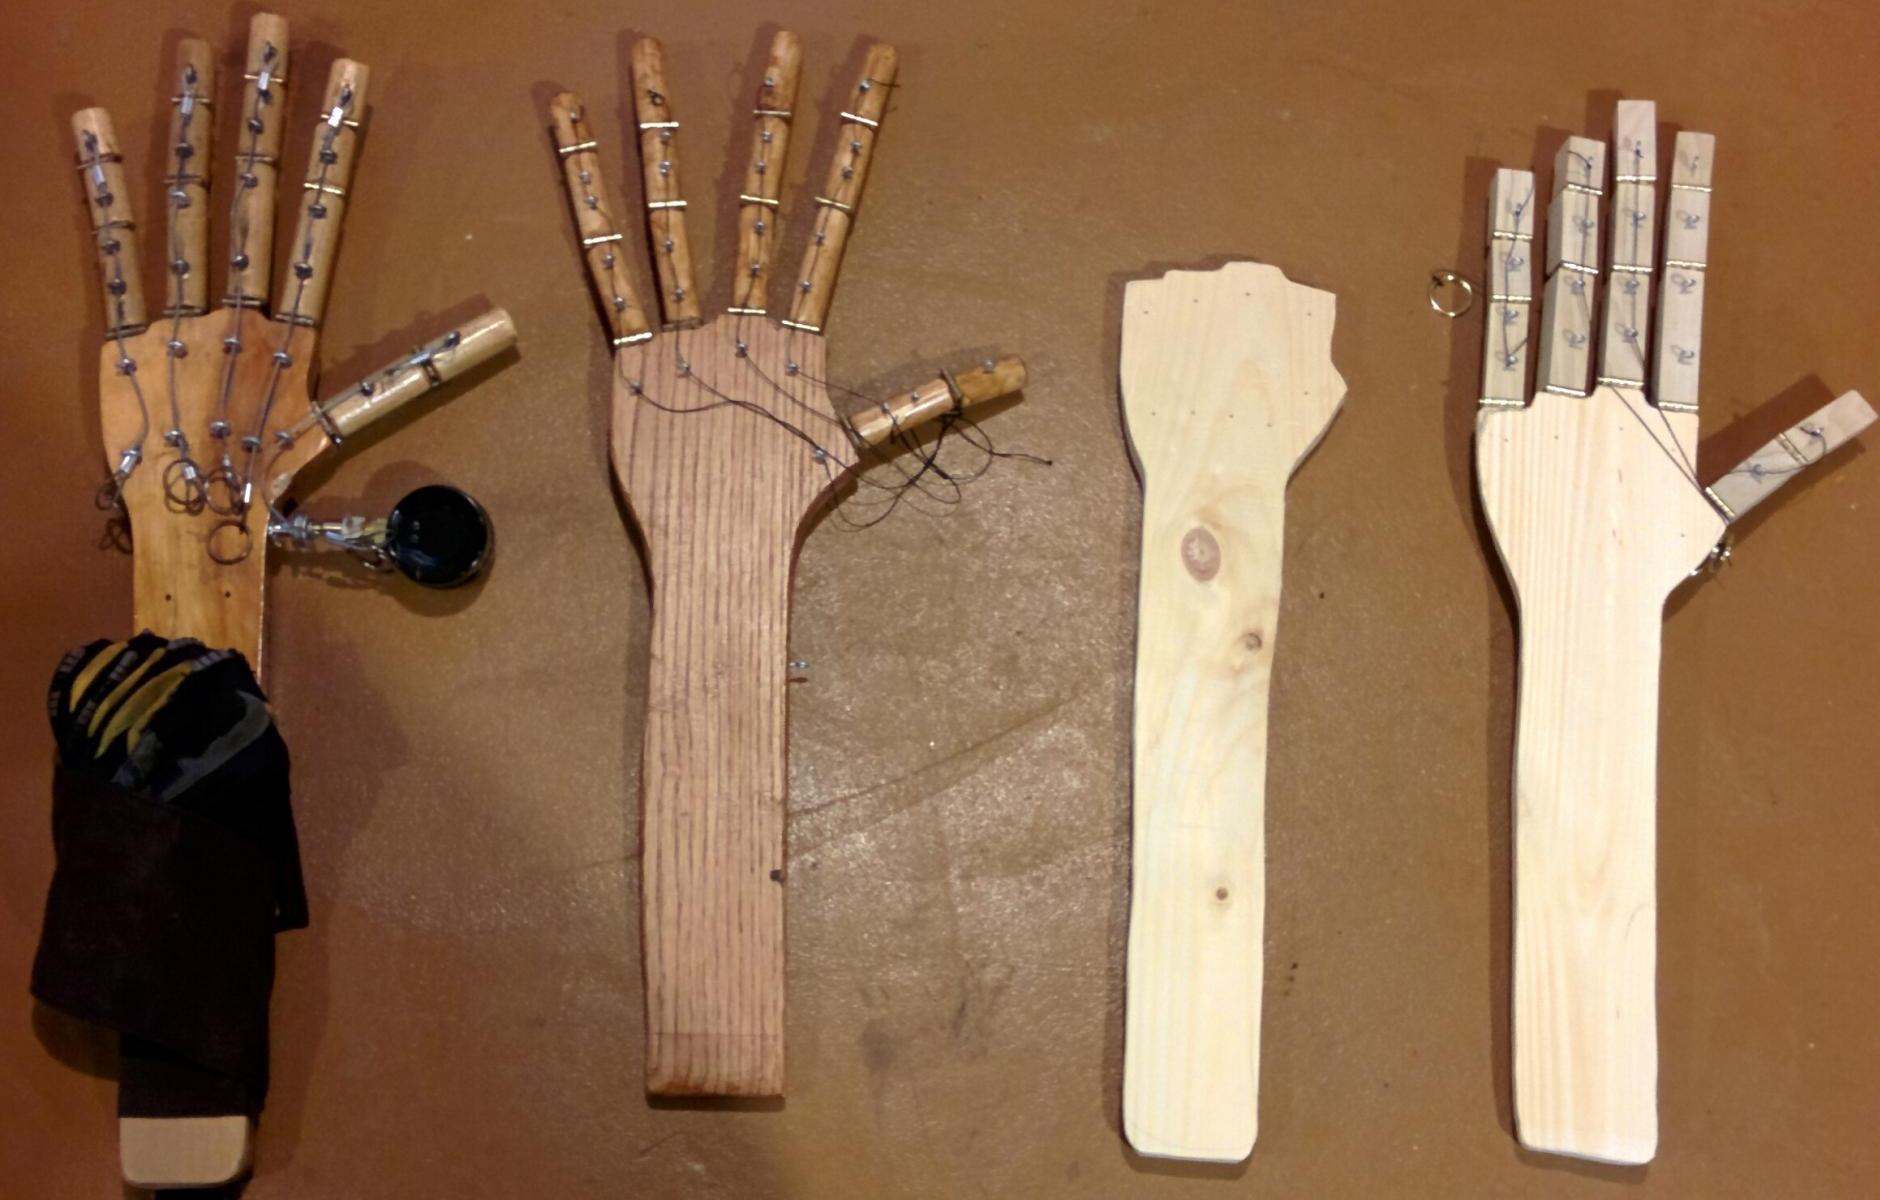
With the original hand going through constant repairs, slowly degrading, I decided in July 2016 to recreate the magic. I wrote up some measurements of the finger pieces, made sure to cut out an appropriate hand-and-arm piece and got to work.
I bought myself a nice dremel, since this time I wouldn't have access to the little belt sander I once used.
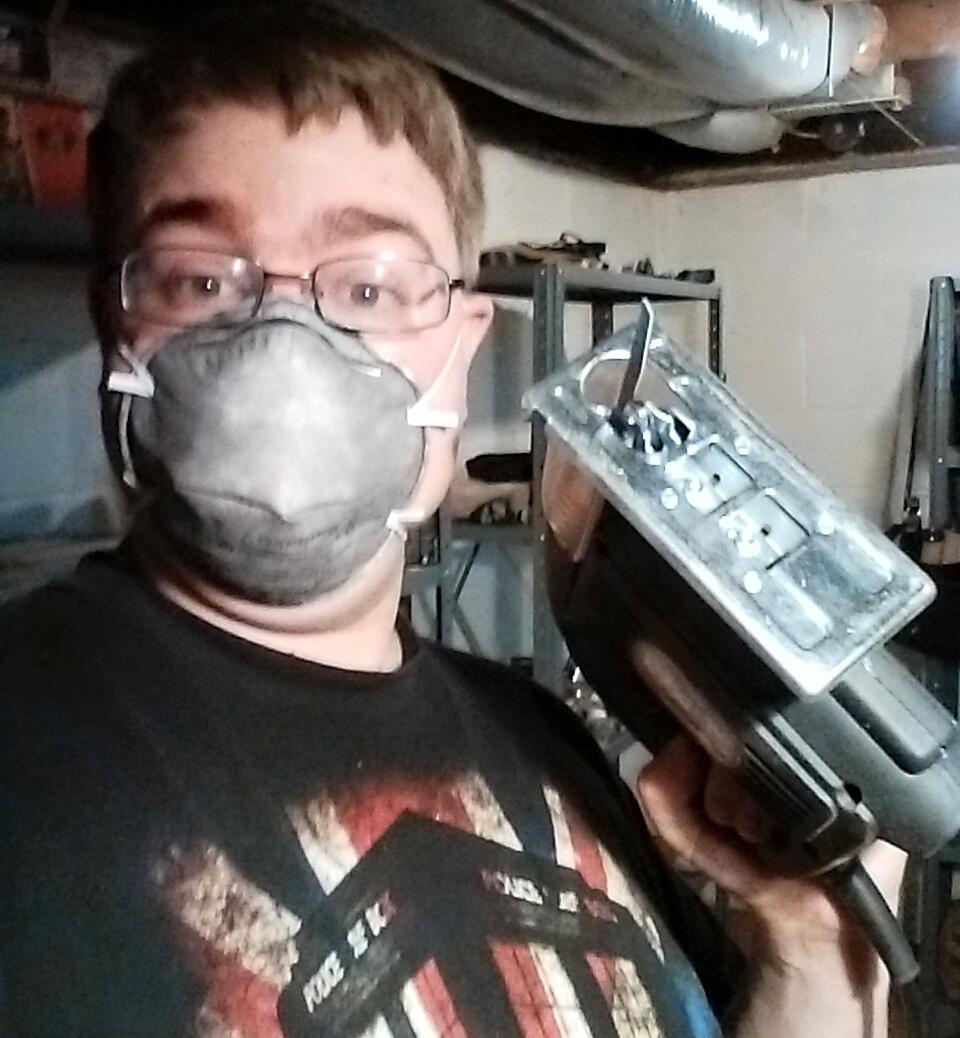
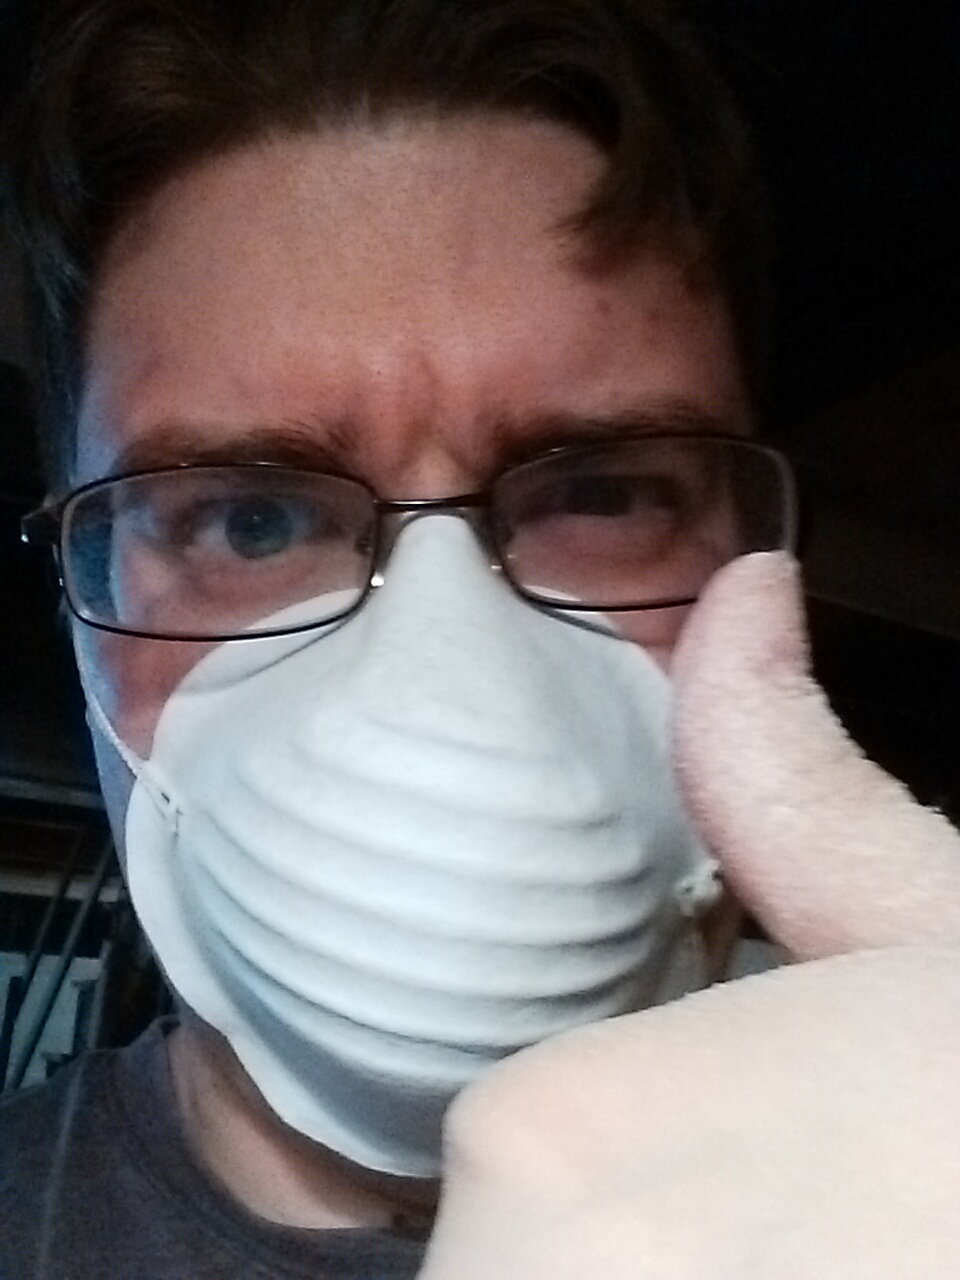
I was much better at taking health precautions this time, keeping a vacuum nearby and wearing a face mask.
I was a lot more organized this time around and it really made the experience that more pleasant.
I made sure to take better photos of the intermediate steps.
And once it was all working, I disassembled it all and applied the stain / protection.
It looks pretty decent, but the sad fact is that this version was a failure. The fingers ended up rubbing together in the strangest way, and totally didn't feel right.
Model 02
So immediately after that disaster to exactly recreate, I went for a new approach. Creating something that both was new and looked new: Square fingers and a new sleeve! There are opinions on which finger shape looks better, I'm still of both minds.
I started again, and was extra careful about repeatedly testing during production and good measurement.
I took a progression photo before staining the wood on version 2. The original, the failure, a failed hand-and-arm, and the successful version 2.
And the new sleeve? I finally got to "glue some gears on it and call it steampunk", which while stereotypical, I never did before.
While a good replacement, this one requires just as much maintenance throughout the year as the original.
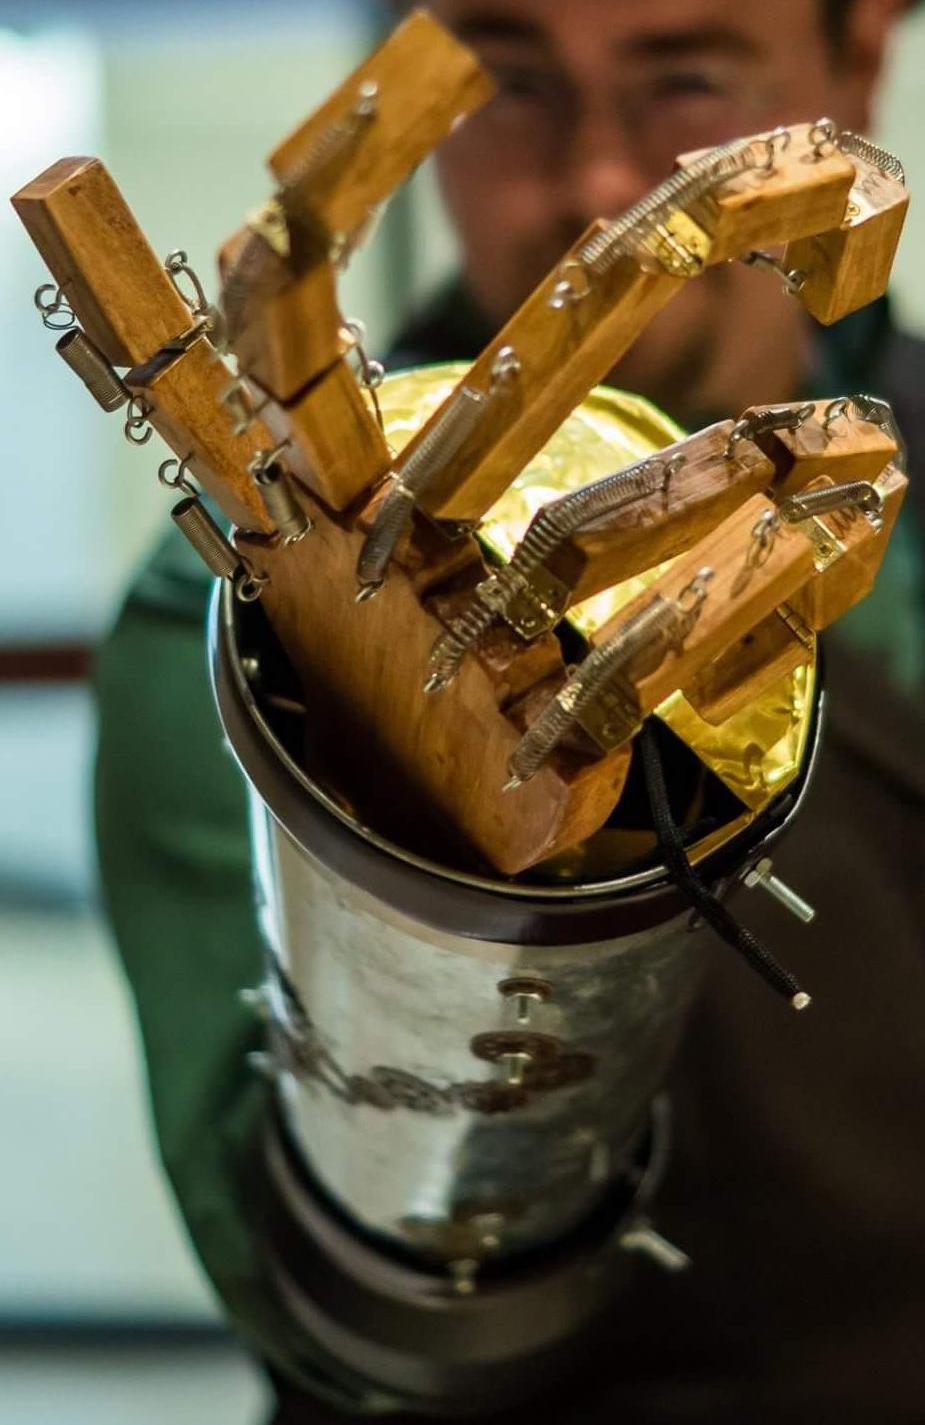
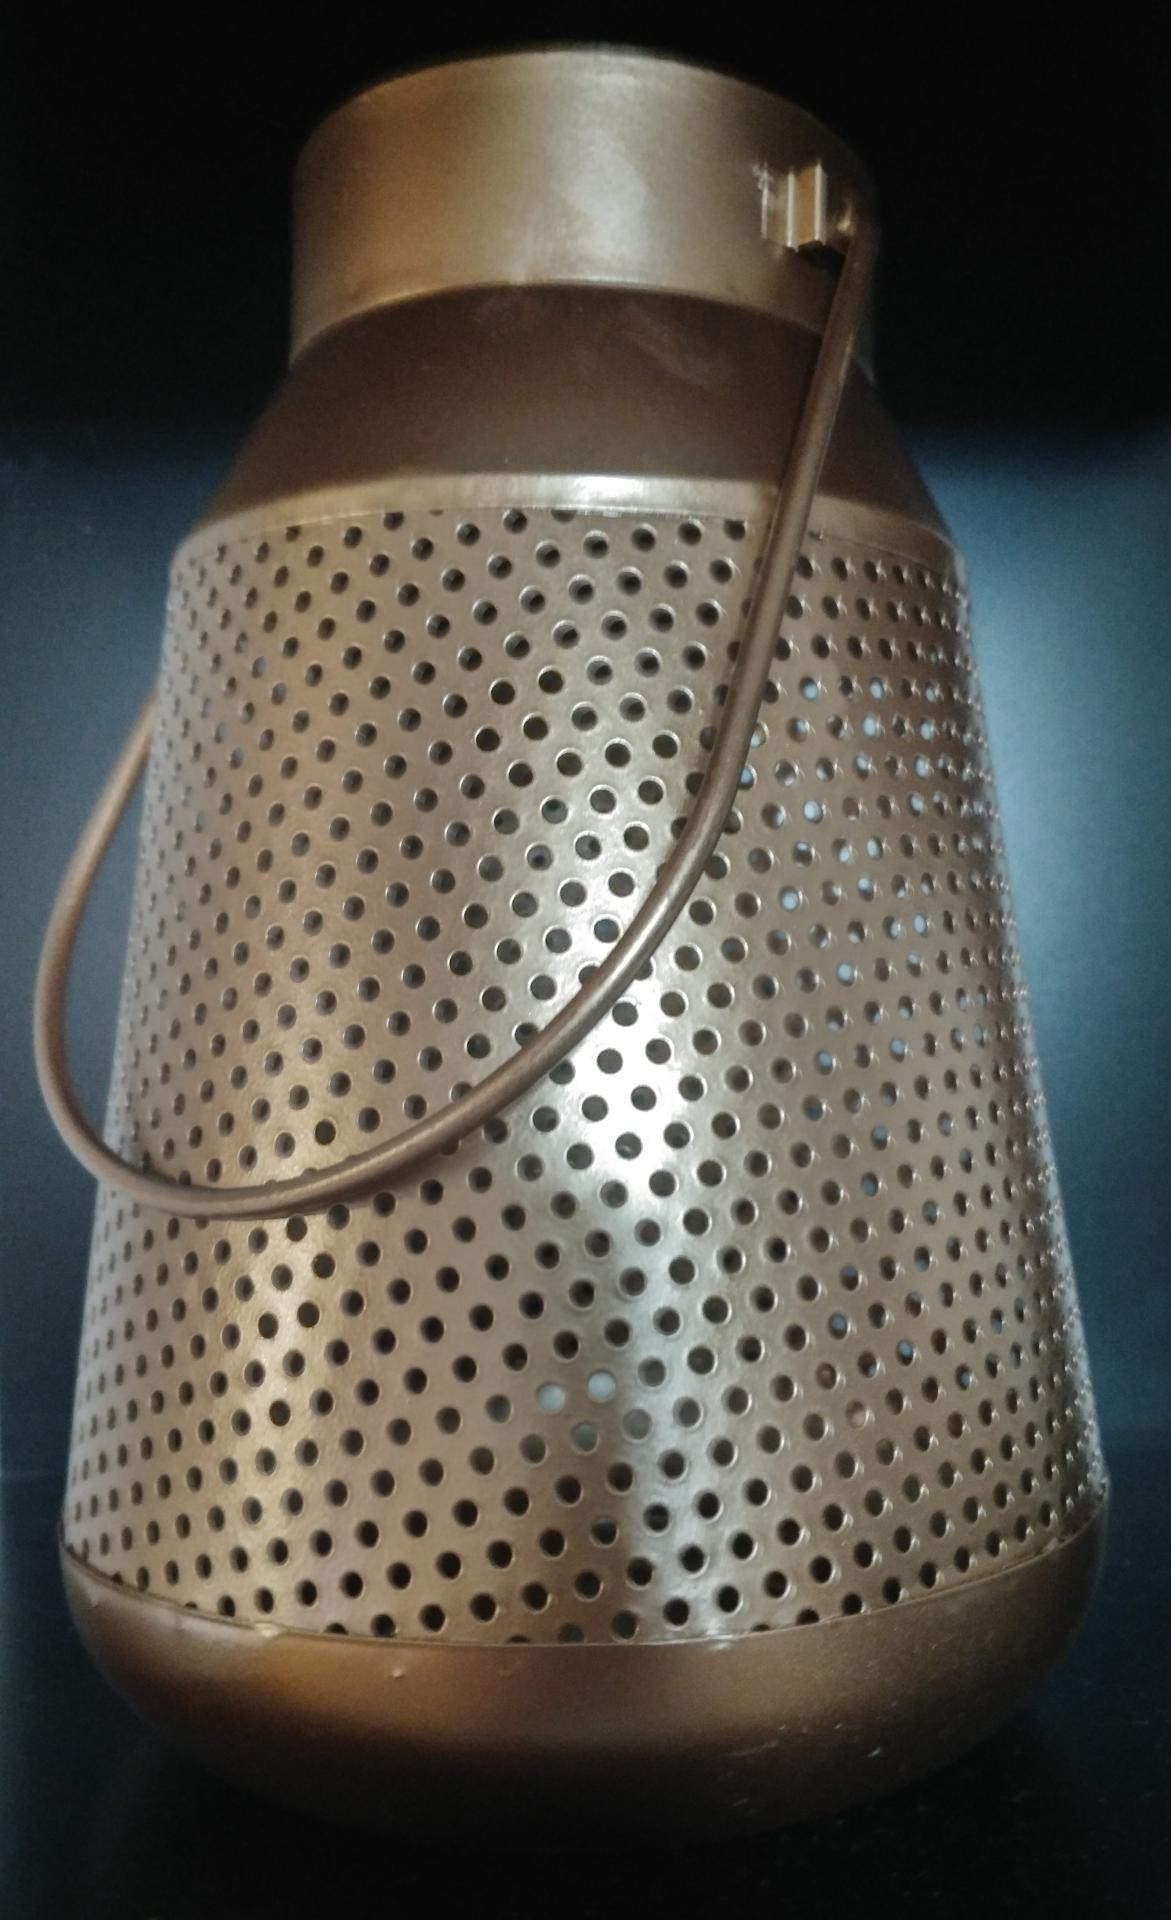
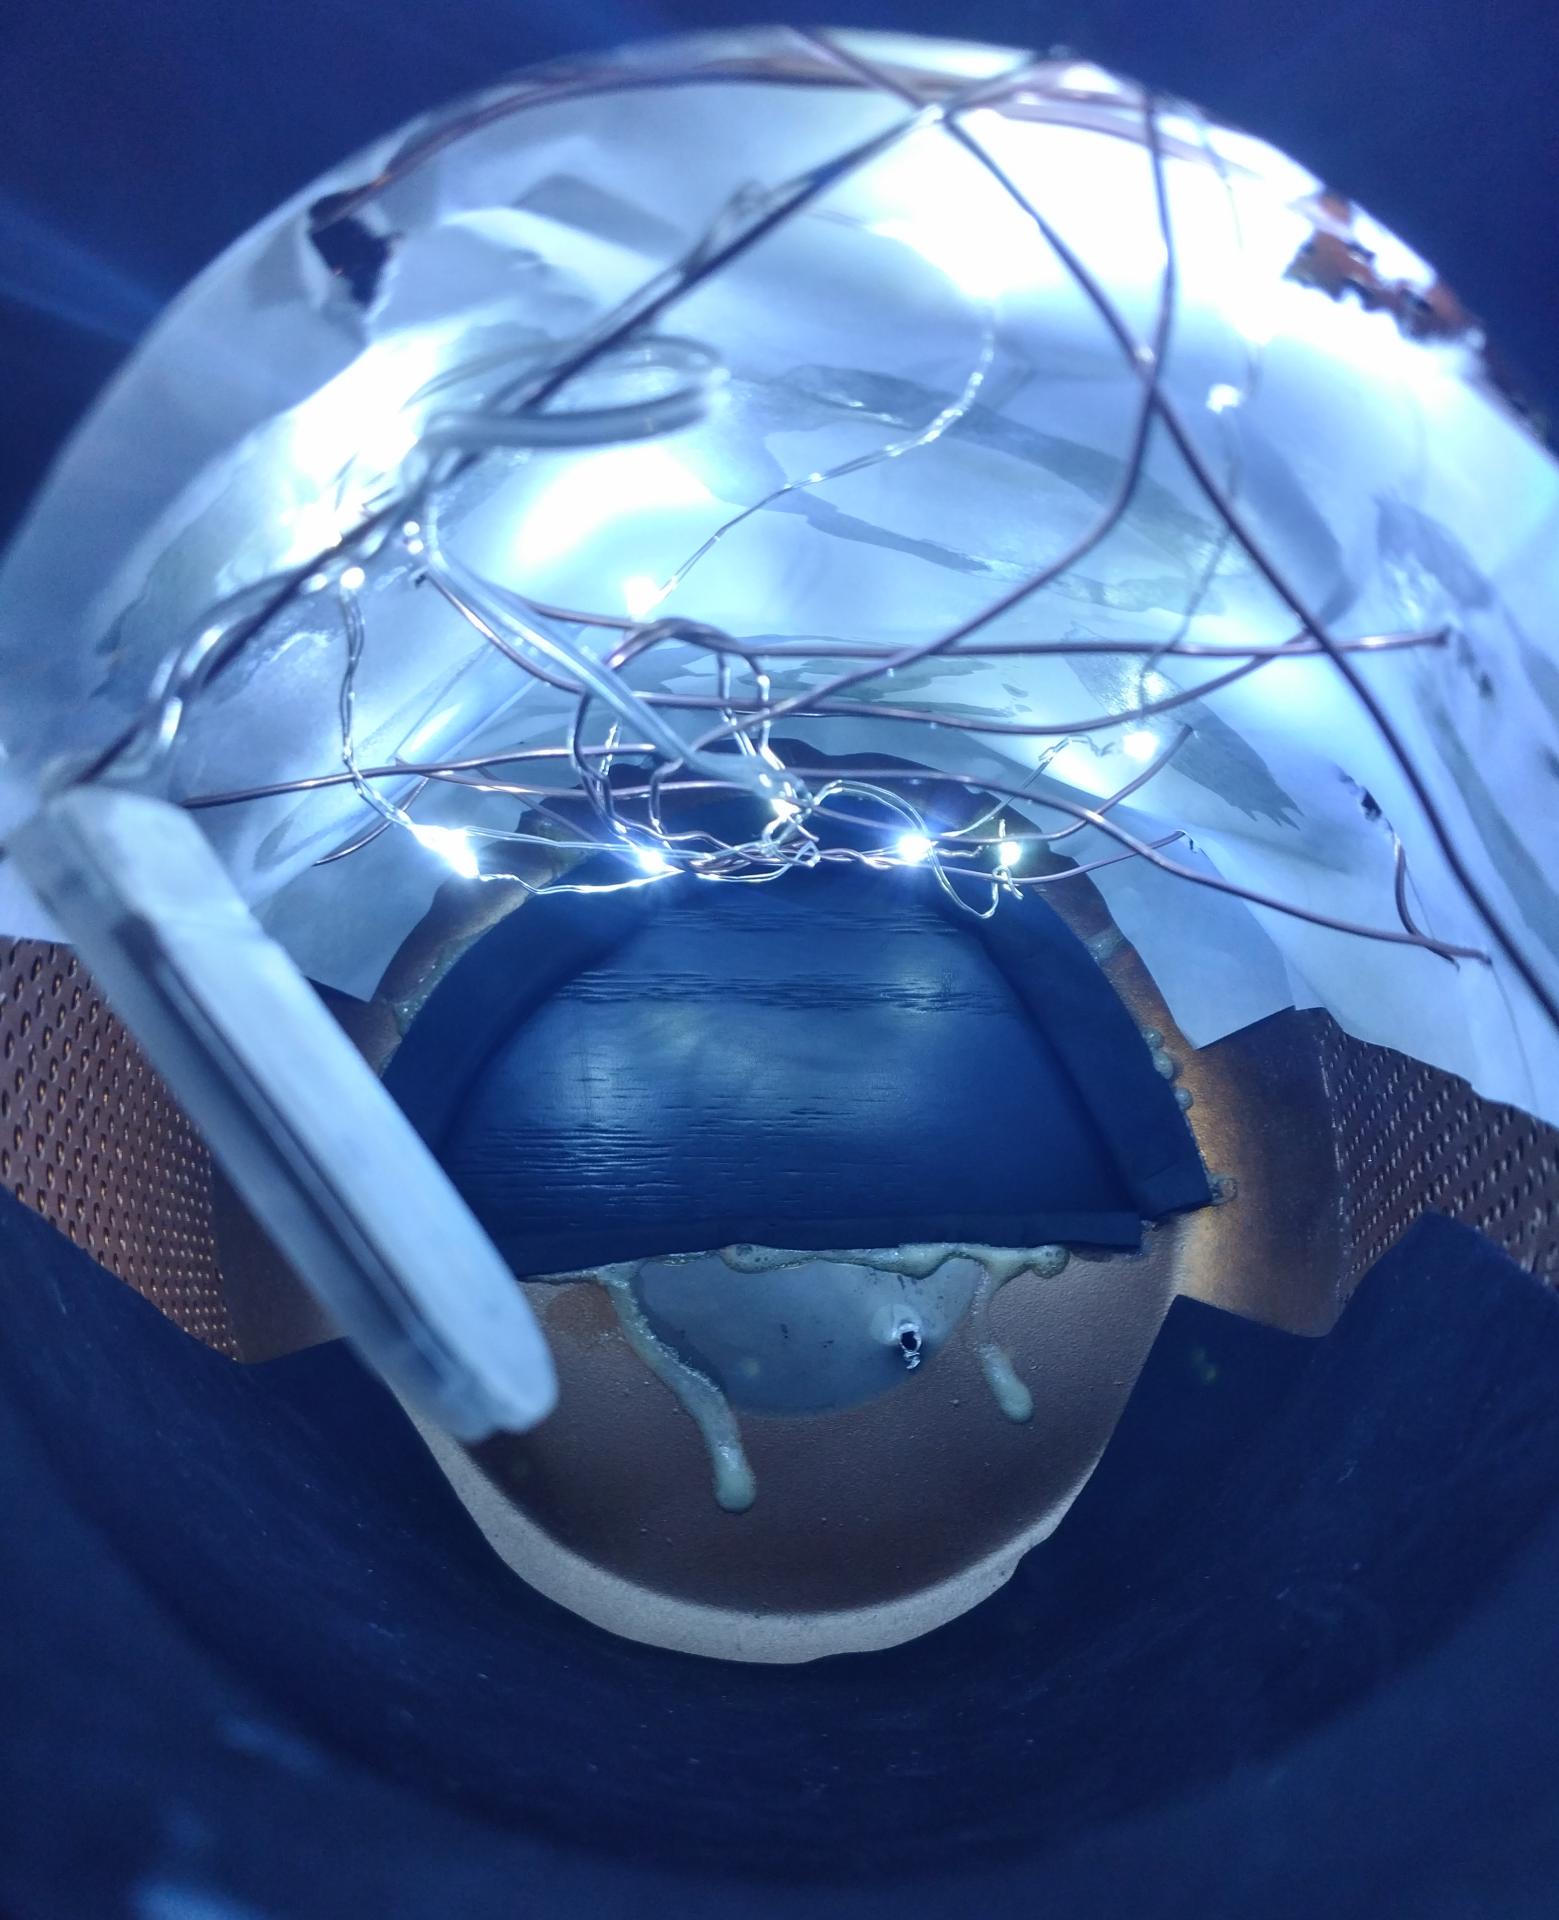
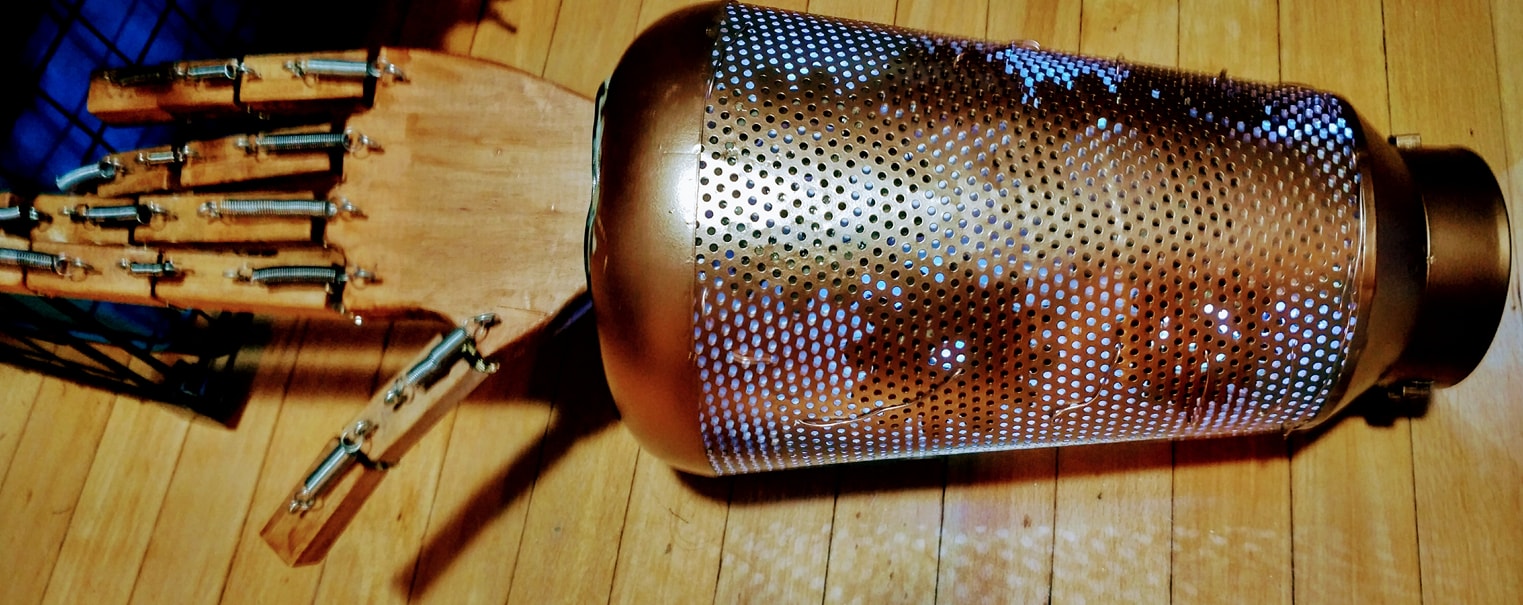
The Copper Arm
I saw a great copper-colored lantern with grating at JoAnn's Fabrics and I just knew it would be the perfect thing. I also grabbed a tiny version, just in case - I really didn't know what I was going to be able to do with them.
I exhausted my dremel's fastest setting and let the sparks fly cutting into the bottom of the lantern, which would become the front where the hand comes out. With a bit of difficulty, I got the handle off only removing one of the connectors, which I epoxied back on. I might want to use those later.
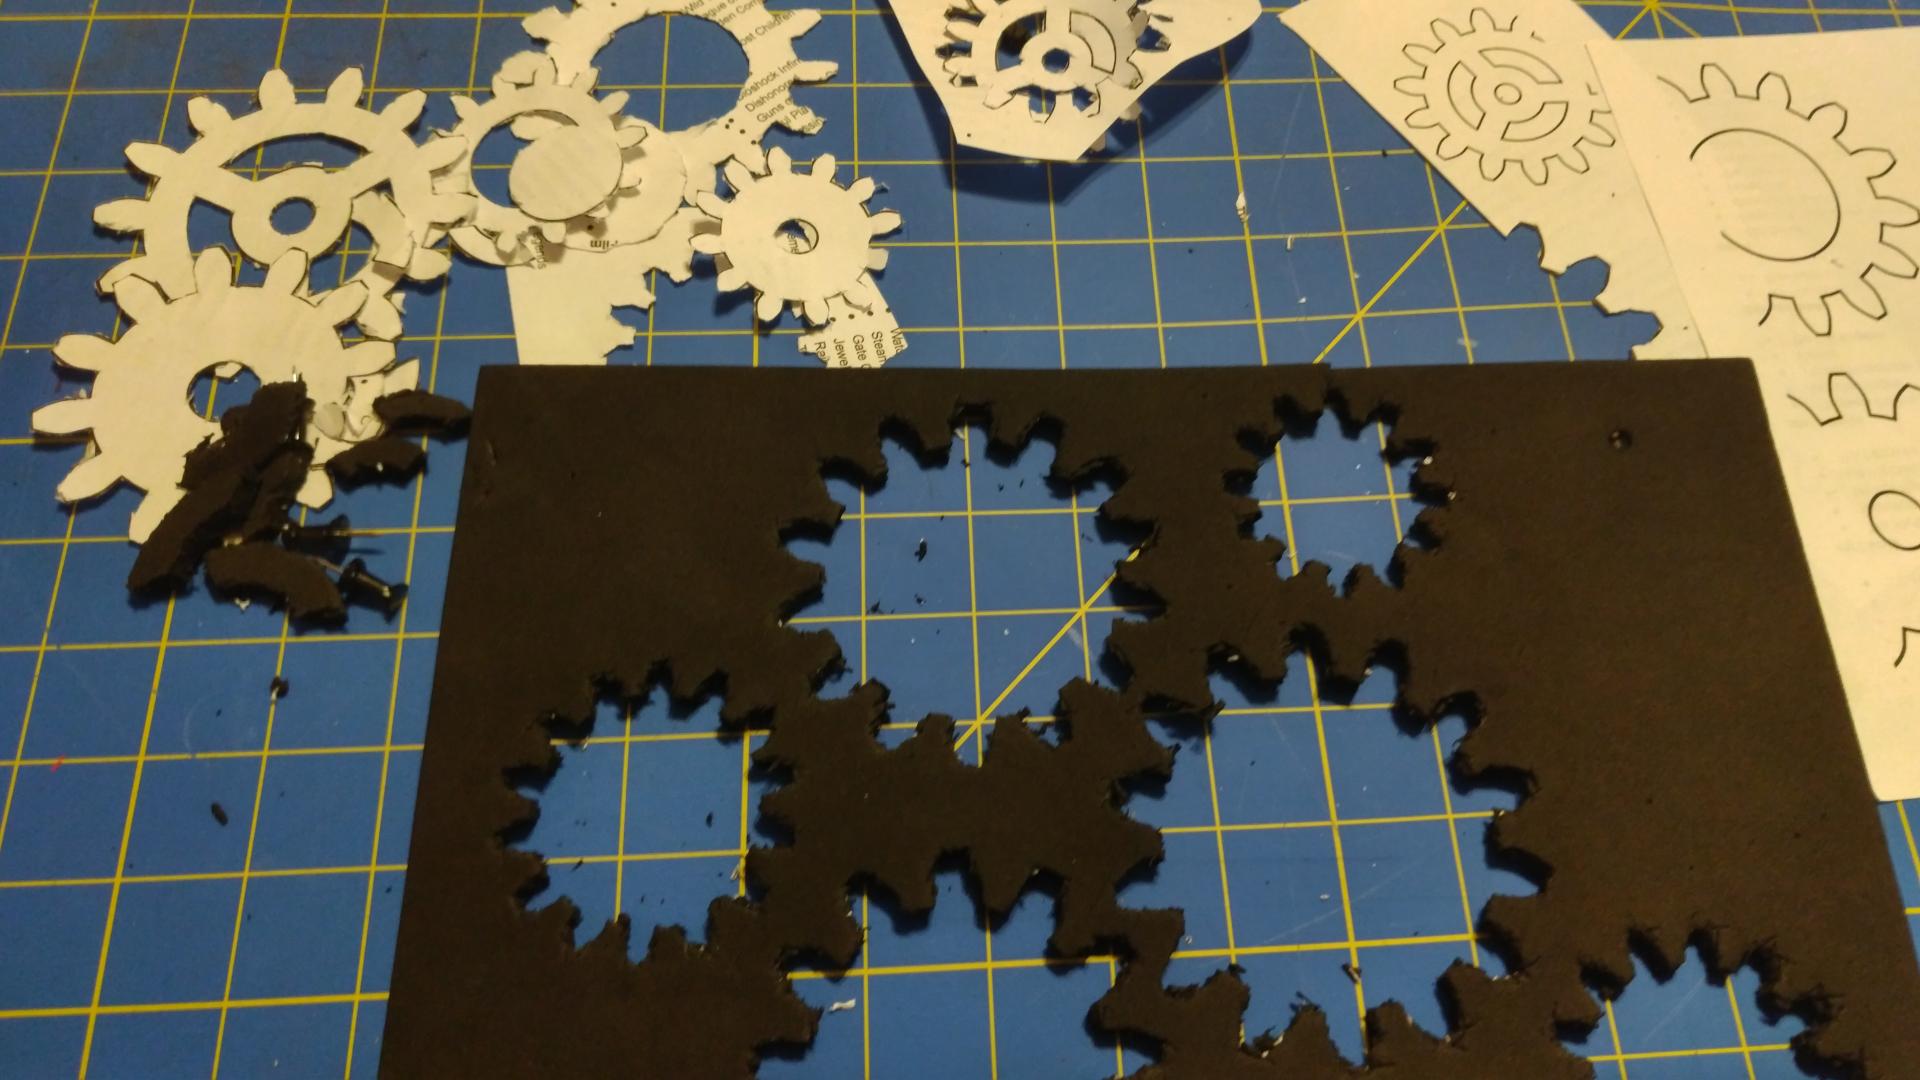
Next, I made some gears using the gears-dev extension in Inkscape. I had to turn off the little warning message that lets you know about gears that are actually mechanically terrible; I wanted fewer teeth/cogs because I knew I'd have to cut them out, and it wants 18 or more per gear.
So, I printed them, pinned the paper to some thick foam and started cutting with an Exacto knife.
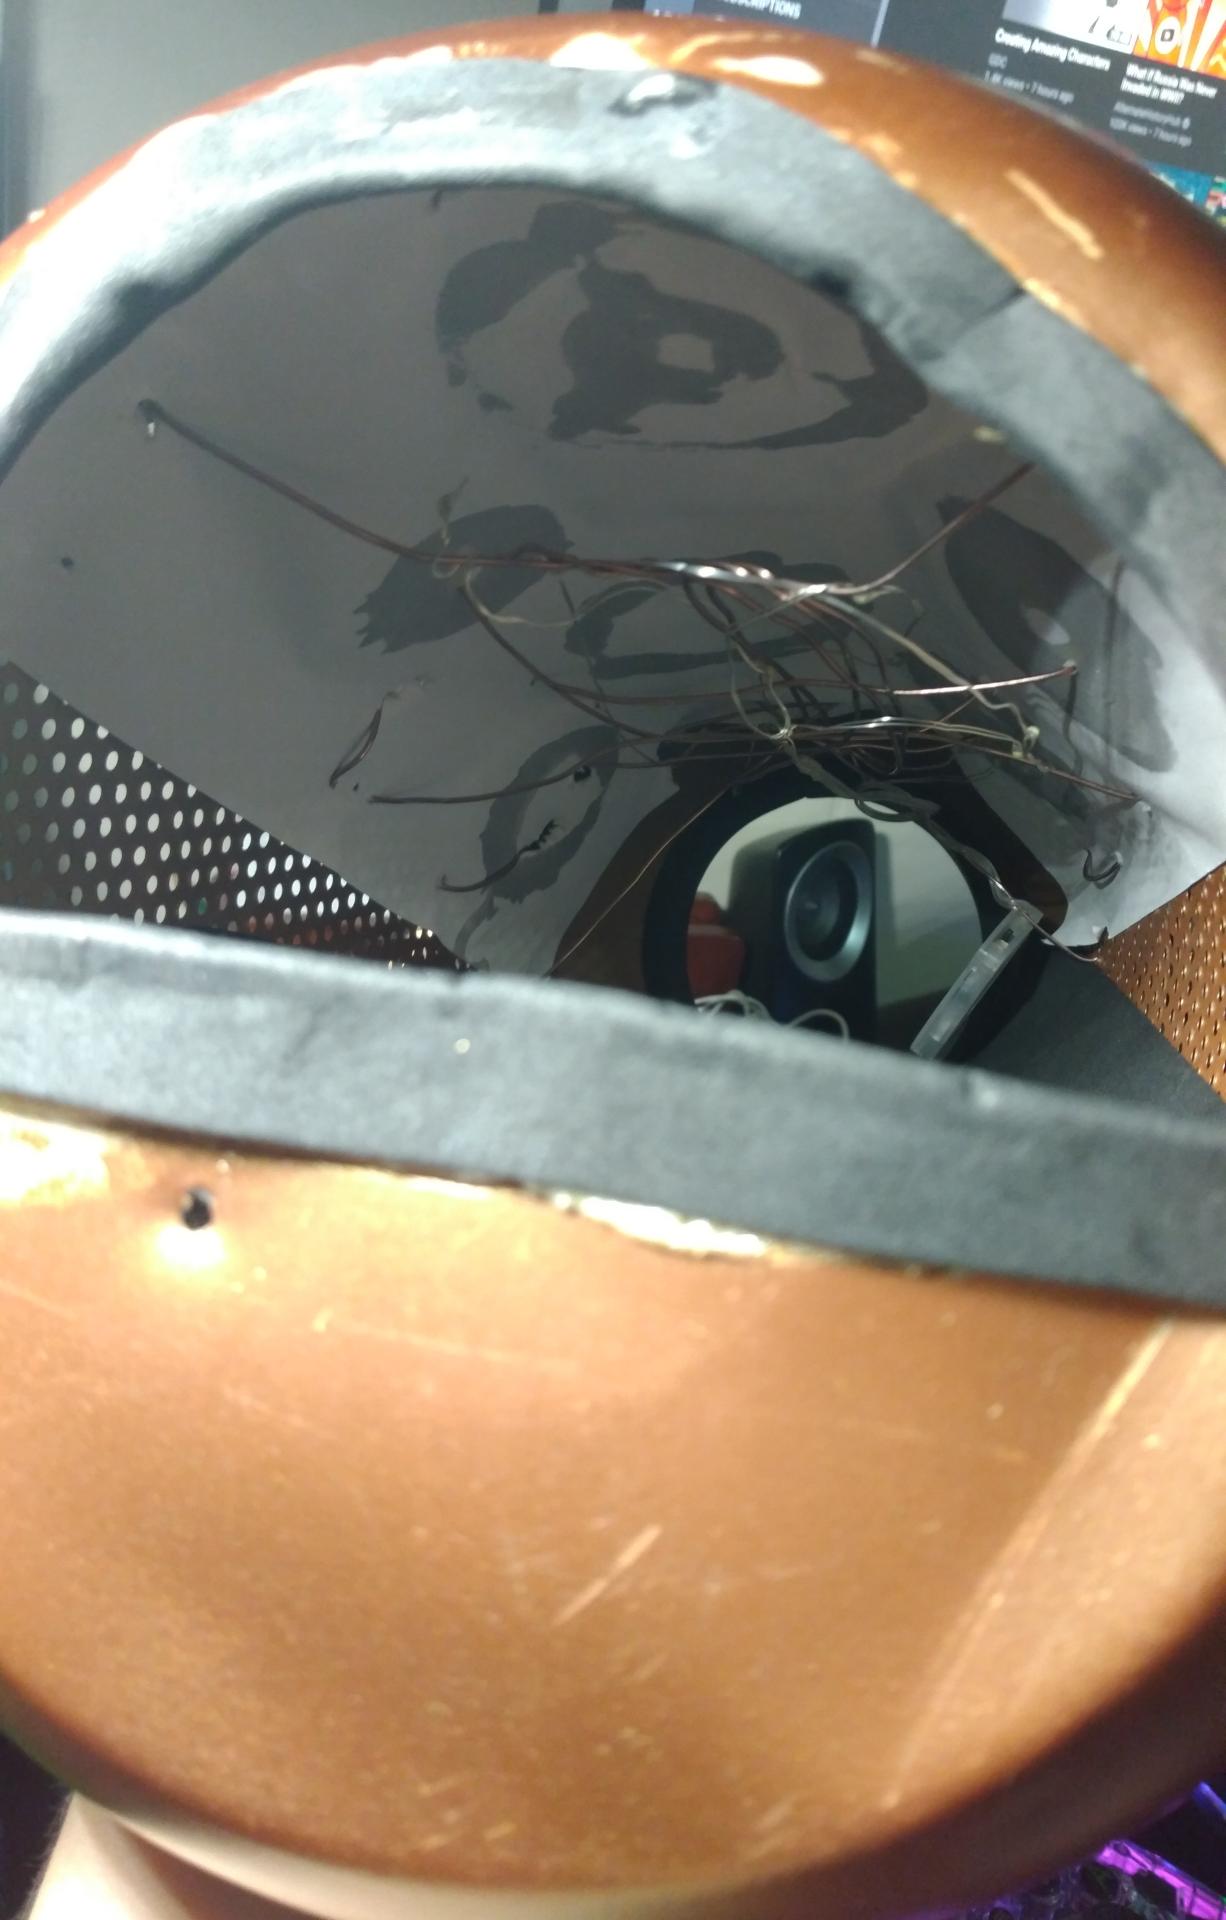
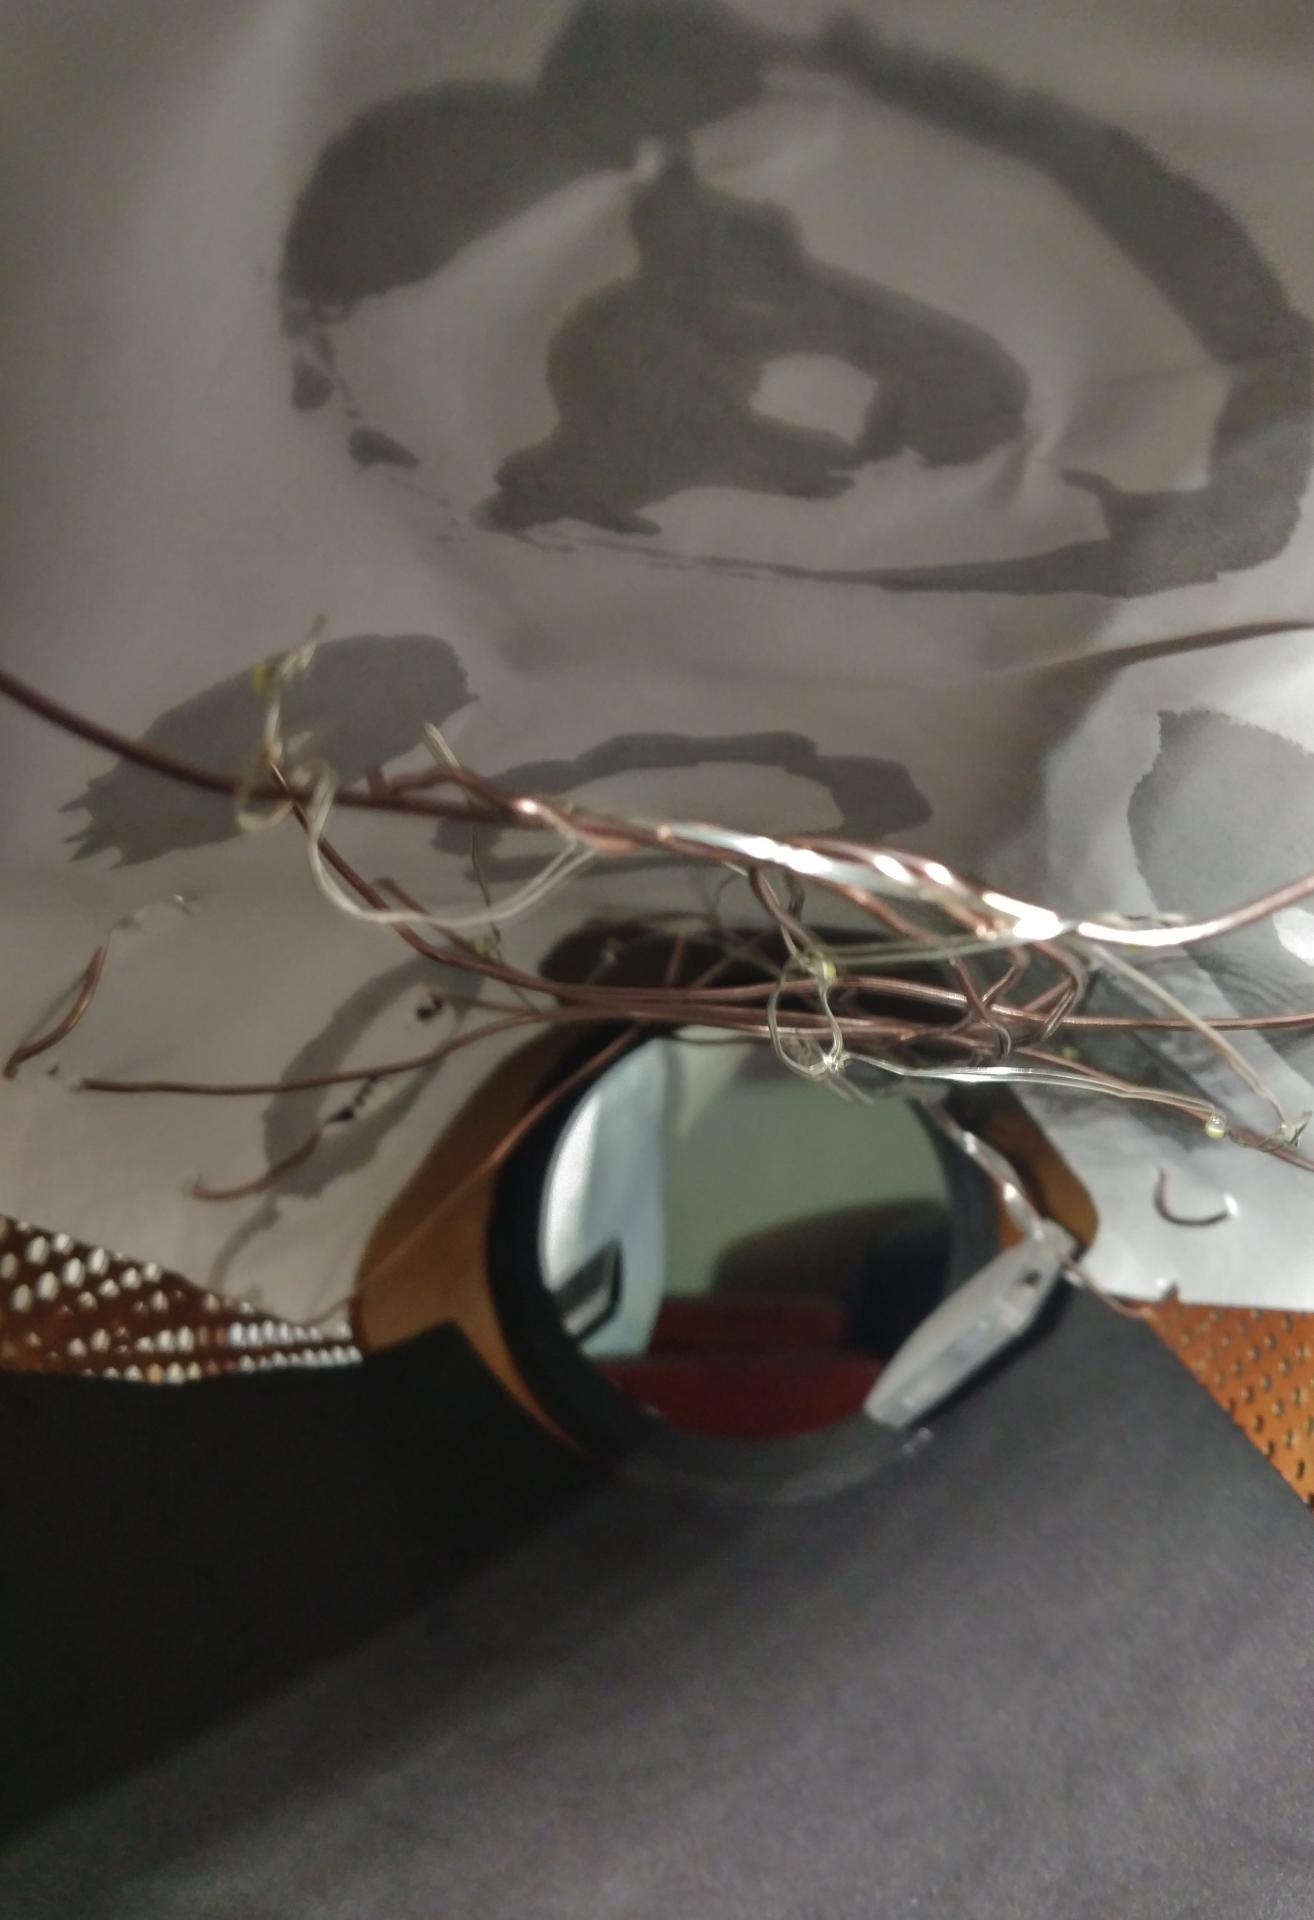
I glued them to a white piece of paper and the top-inside of the modified lantern. I used some wire to run through the top of the grating - to use as the sleeve to slide the hand through. I put the hand through several times along the way just to make sure the fit was right before it became permanent.
Lastly, the only way those gears were going to be very visible through the grate, I weaved some LED string lights through the hand-securing wire.
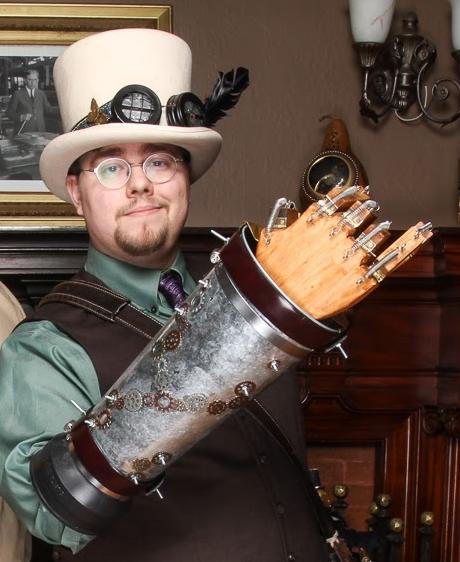
And I'm very happy with the result, just in time for 2018 Fan Expo Boston!
An Ongoing Story
The nature of the design for the hand I'm working with — small hinges and constant pressure — is just a recipe for constant maintenance, but it's currently a price I'm willing to pay for the privilege of my most identifiable feature, the signature prop for Lucas M. Buford.
As such—and as it is with many steampunk props—this is an ongoing project, so this will not be the end of the story.